Audit Schedule
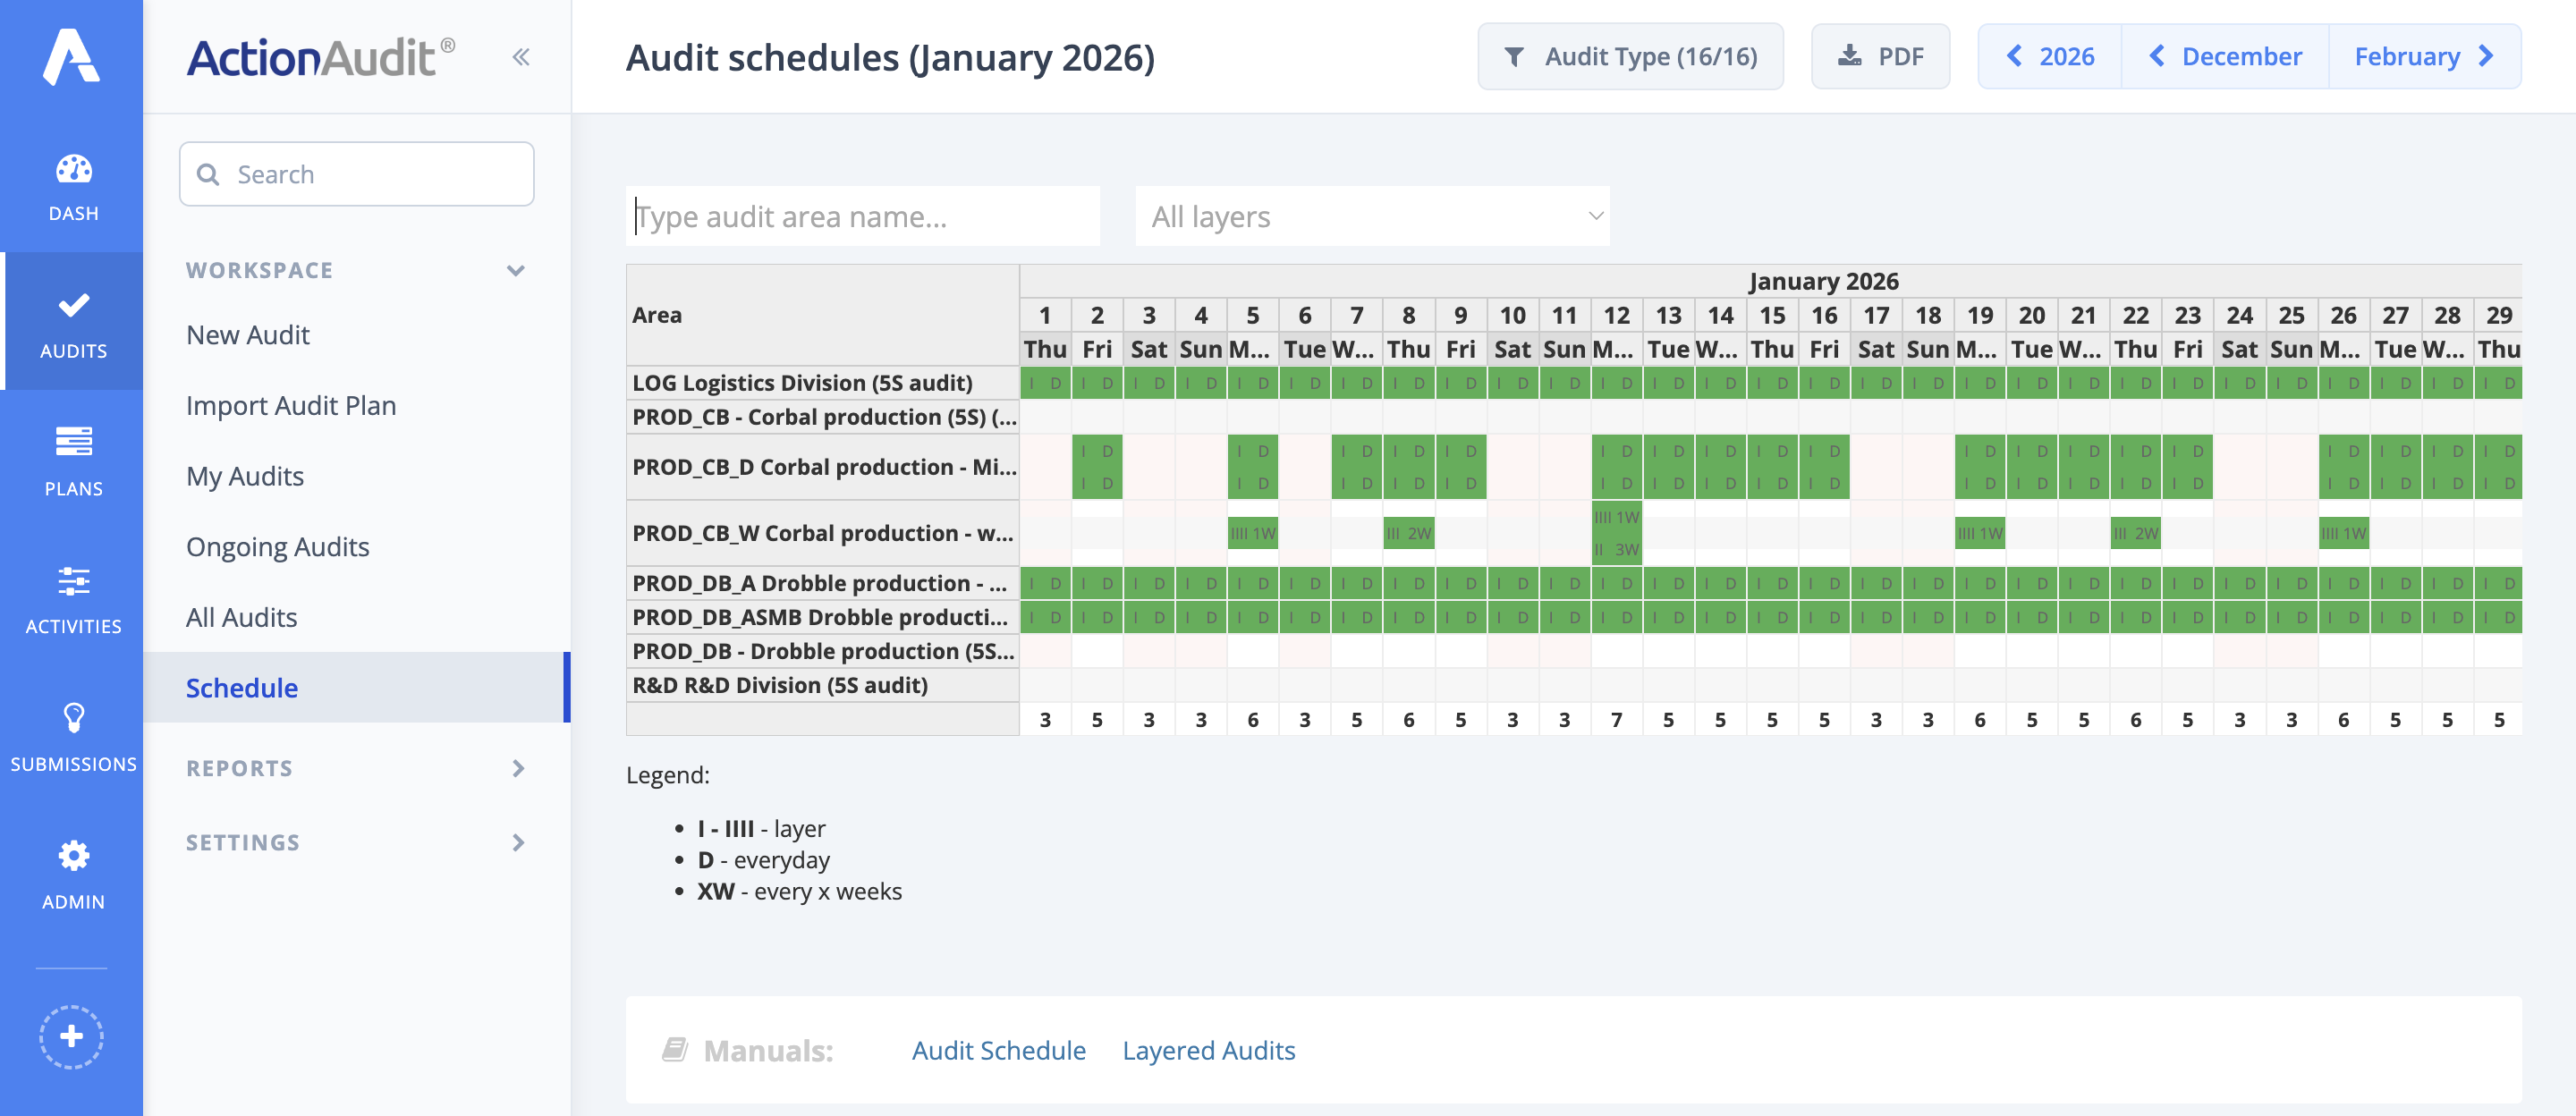
The Action Audit system’s audit module provides a universal view for creating schedules for all types of audits, including multi-layered ones, while maintaining clear information visibility. The image below shows an example schedule that includes both single- and multi-layered audits.

Weeks view in the schedule
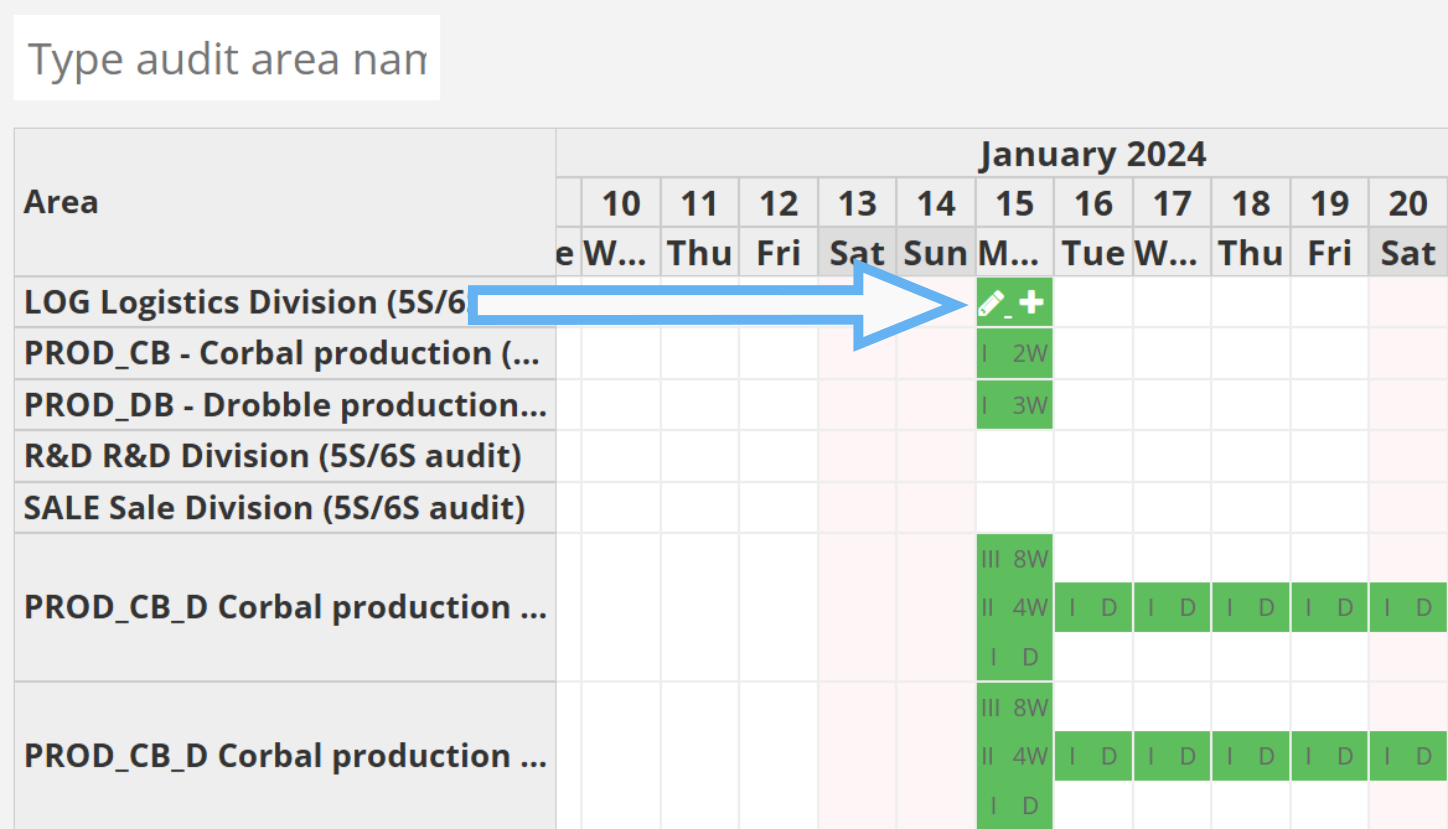
When viewing the yearly schedule, you can notice numbers displayed under the names of the months. These represent the consecutive weeks of the year. In cases where a particular week spans two months, the column representing it is split.
Navigation
By default, when the schedule is displayed, the user sees the audit plan for the entire current year. Navigation links at the top of the page allow switching views one year forward or backward. Weeks in which a zone audit is conducted are marked in green weeks. If a zone’s name field is wider, it means the audit is conducted on more than one layer. In such cases, the number of green rectangles corresponds to the number of layers audited in that week.
The ⚠️ icon displayed next to some zone names indicates that certain data from this schedule will only be visible after switching to the detailed monthly view.
Creating a New Schedule
By clicking on a selected audit period within a zone, the user can plan a new schedule. The image below shows the form that appears when creating a new schedule.
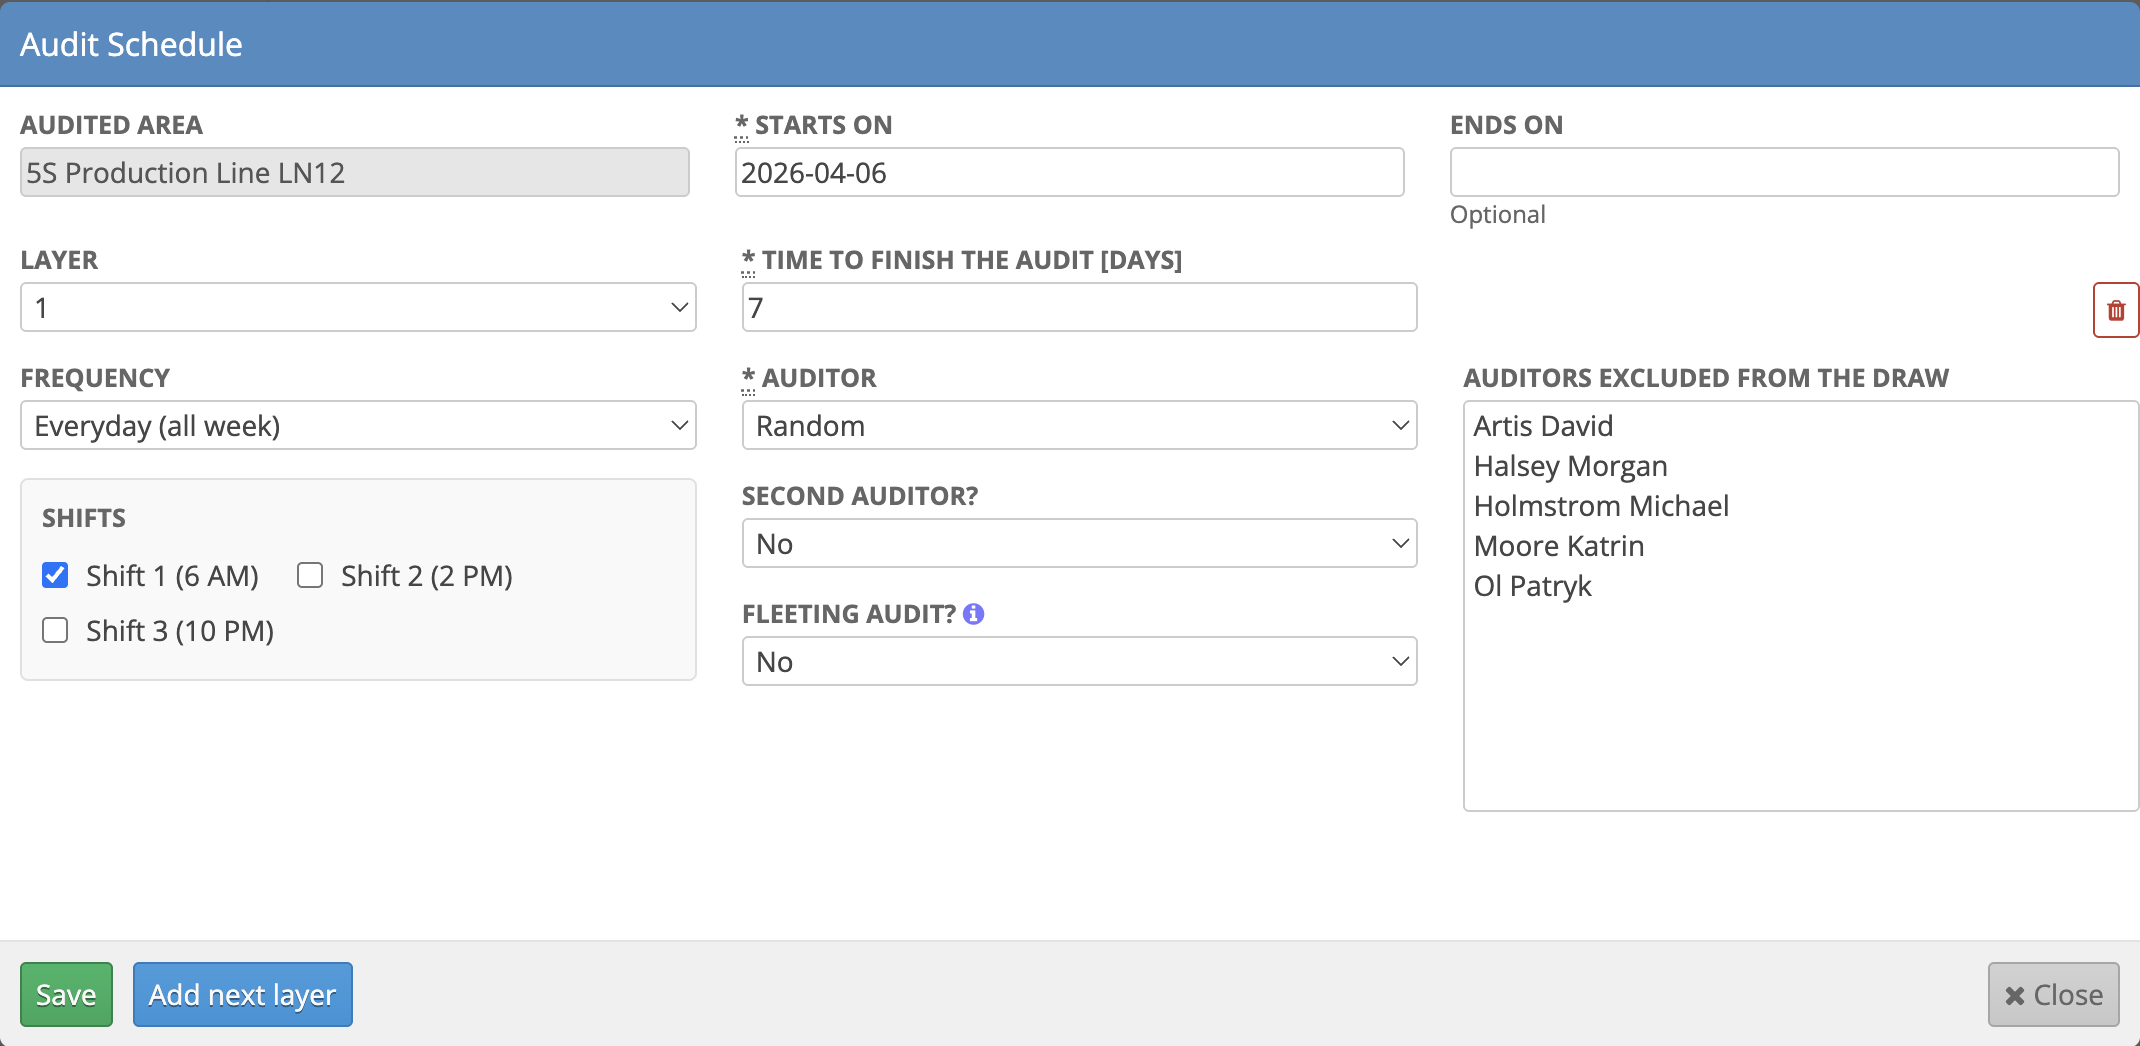
The form consists of the following fields:
- Audited Area - a previously created area where the audit will take place, selected when clicking the period in the schedule view.
- Audit Initiator - the user creating the schedule.
- Starts on - the start date of the schedule, indicating when audits will begin to generate. This is determined by selecting the chosen period in the schedule view.
- Ends on - the end date of the schedule, after which audits will stop generating (optional).
- Layer - the layer of the checklist the schedule pertains to. Using the Add another layer button, schedules can be created for multiple layers, each audited with different settings. To remove a layer, click the trash bin icon. More information on layers and LPA audits can be found in the Layers section.
- Frequency - determines how often the audit should be generated:
- Daily (all week)
- Daily (business days)
- Weekly
- Monthly
- Every - defines the audit generation cycle, e.g., every 2 weeks
- Weekday - the day of the week on which the audit will be generated. By default, the System-defined option is selected, which will generate the audit on the first working day of the selected period.
- Time to finish the audit [days] - the number of days the assigned user has to complete the generated audit. After this period, the audit can still be completed but will be marked as Completed Late in reports.
- Fleeting audit - specifies whether the generated audit will disappear after completion if no discrepancies are found.
- Shifts - allows to execute an audit at the beginning of a selected shift.
- Auditor - the user assigned to complete the generated audit. Options include members of the auditor group assigned to the area, the area leader, or a random option that selects one person from the group for each new audit, excluding those excluded from the draw.
- Second auditor - allows assigning a second auditor with permissions to view or conduct the audit.
- Auditors excluded from the draw - a list of all auditors in the assigned group where users can select those to exclude from the draw.
It is possible to exclude multiple individuals simultaneously by clicking and selecting their names in the Auditors excluded from the draw field while holding down the CTRL key on Windows or CMD on Mac operating system.
After completing all fields, confirm the creation of the schedule by clicking the Save button.
If the Daily frequency is selected, the schedule will not appear in the yearly view. To view it, switch to the monthly view.
Layers
More information on layers and LPA audits can be found in the Layered audits section.
Modifications
Editing a Schedule
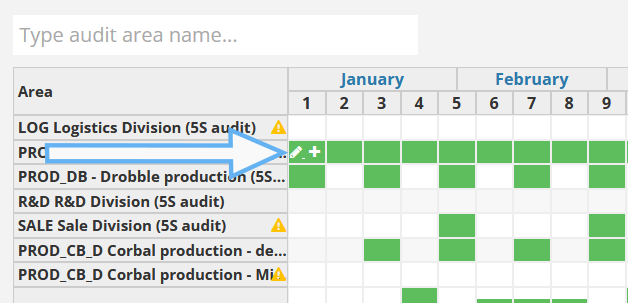
To edit an existing schedule, click the pencil icon displayed when hovering over the relevant area in the schedule.
Adding to a Schedule
To add a new schedule to a previously selected period, click the plus icon displayed when hovering over the relevant area in the schedule.
Monthly View
Clicking on a month’s name takes the user to the monthly view panel, showing audits scheduled for specific days of the selected calendar month.
The legend below helps explain the schedule’s symbols.
Editing and Adding
To edit or add to a schedule in the monthly view, use the pencil and plus icons, just as in the main view.
Deleting a Schedule
To delete a schedule, go to the editing option and remove all layers of the schedule using the trash bin icon.