Pulse Tab
To access features related to the Pulse mobile app, use the Pulse tab from the left-hand side menu. When expanded, the following sections are available:
Messages
In the Messages section, you can view all messages sent or received by the user.
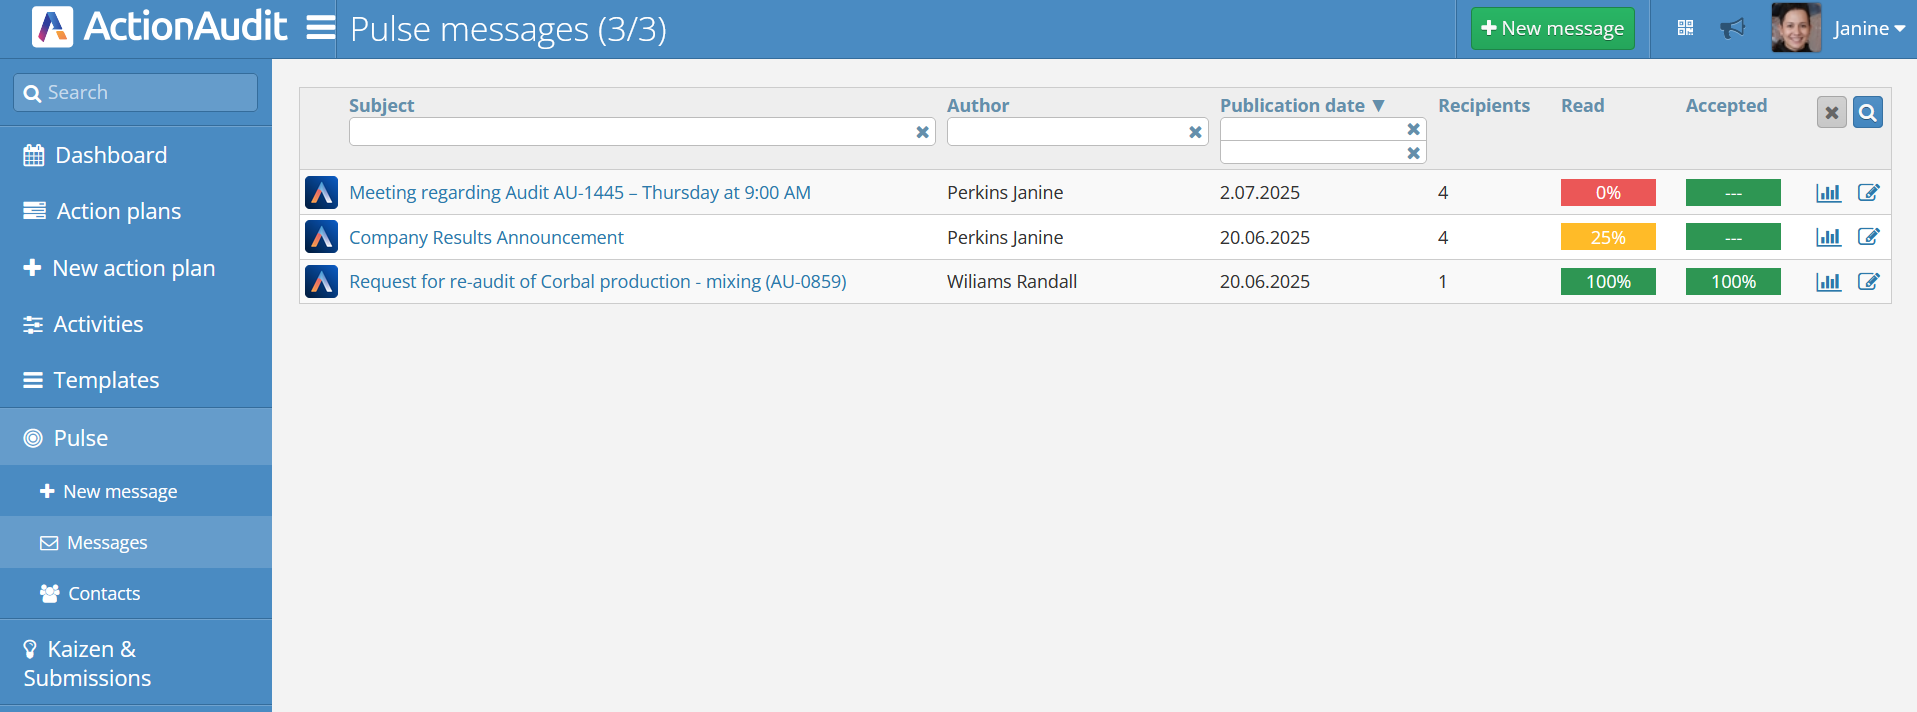
At the top of the screen, a filter bar is available to help you find the desired message. There is also a New Message button. Below, message tiles represent individual messages. Each tile contains:
- Title
- Author – the sender of the message
- Publication Date
- Recipients – number of target recipients
- Read – number of recipients who have read the message
- Accepted – number of recipients who have confirmed the message (if acceptance is not required, this tile shows ”---” and is green)
On the right side, there are two buttons:
- Statistics Button – opens a window with detailed statistics, including the list of recipients and their statuses
- Edit Button – opens a window to edit the message’s title, content, and recipients. If you are the author, you can also delete the message.
Message tiles are color-coded based on their status:
- Red – not read/accepted by anyone or only a few recipients (up to 20%)
- Yellow – read/accepted by some recipients (25% or more)
- Green – read/accepted by all recipients
New Message
To create a new message, go to the New Message section or use the button of the same name in the Messages section. This opens the following screen:
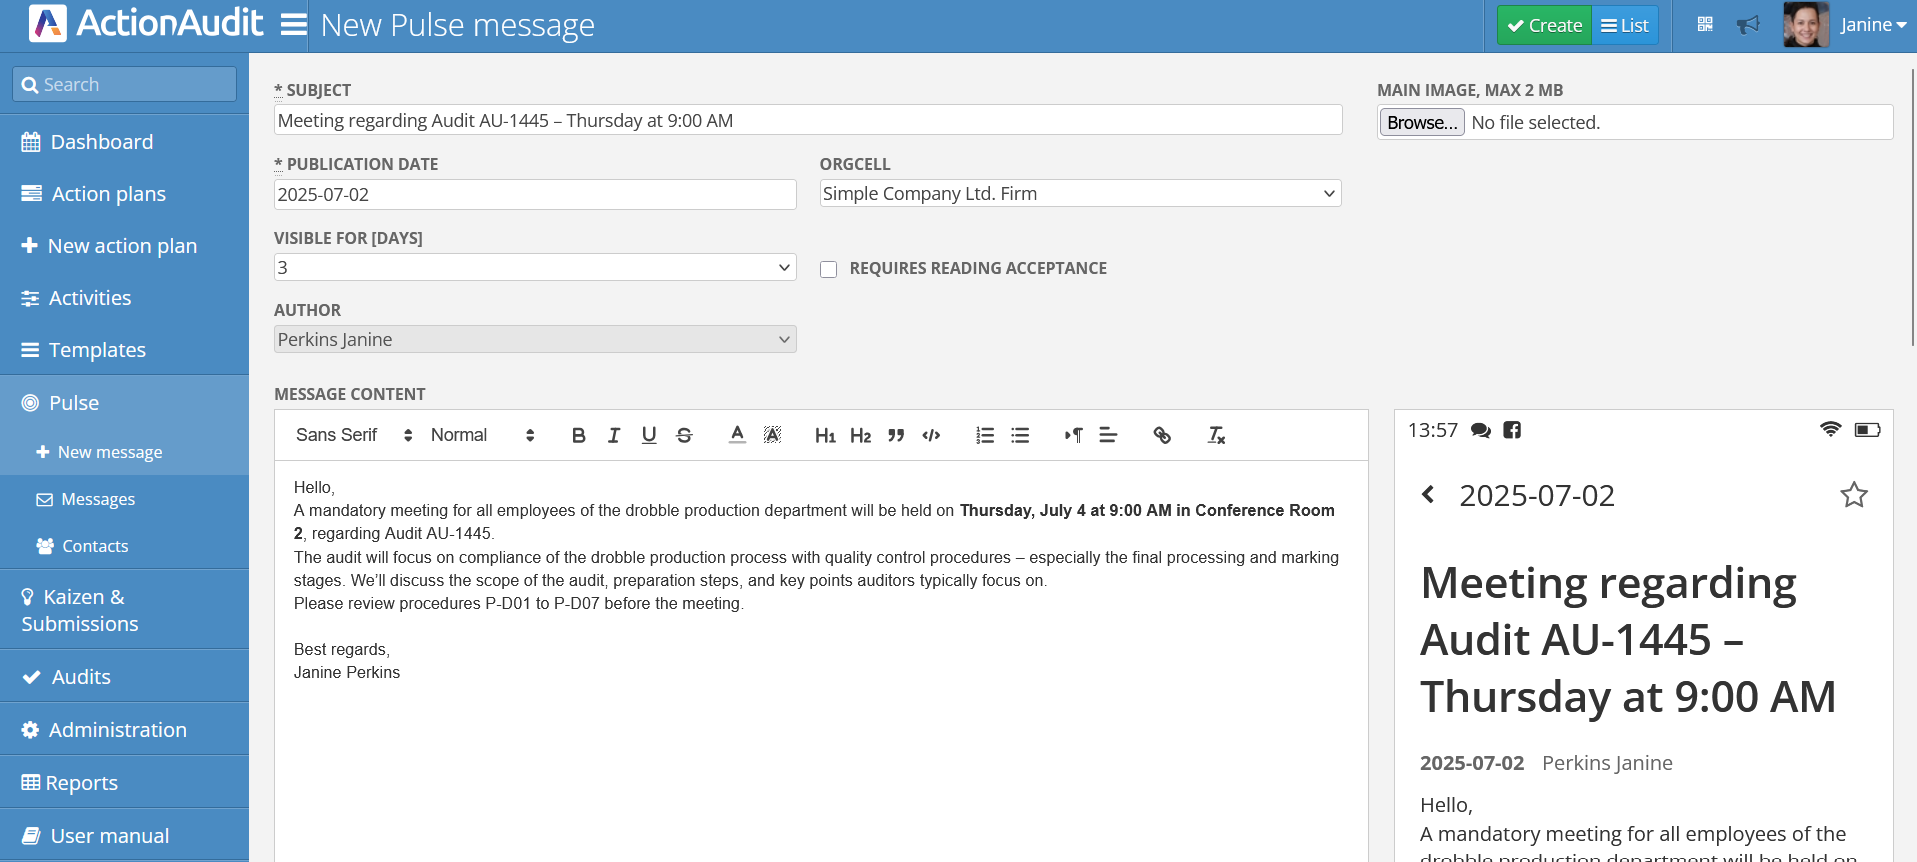
To send a message, fill in the following fields:
- Subject
- Main Image – optional graphic to include in the message
- Publication Date – defaults to the current date but can be changed
- Orgcell – organizational cell the message is directed to (defaults to the user’s cell but can be changed)
- Visible for [days] – duration the message will be visible to recipients
- Requires reading acceptance – whether the recipient must confirm reading (if selected, acceptance stats will appear in Messages)
- Author – allows selecting a different author if more than one Pulse Worker is assigned to the account
- Message Content – message body with support for rich text formatting including bold, italics, links, bullet and numbered lists, images, and tables
On the right side of the message content editor, a preview pane shows how the message will appear in the Pulse app.
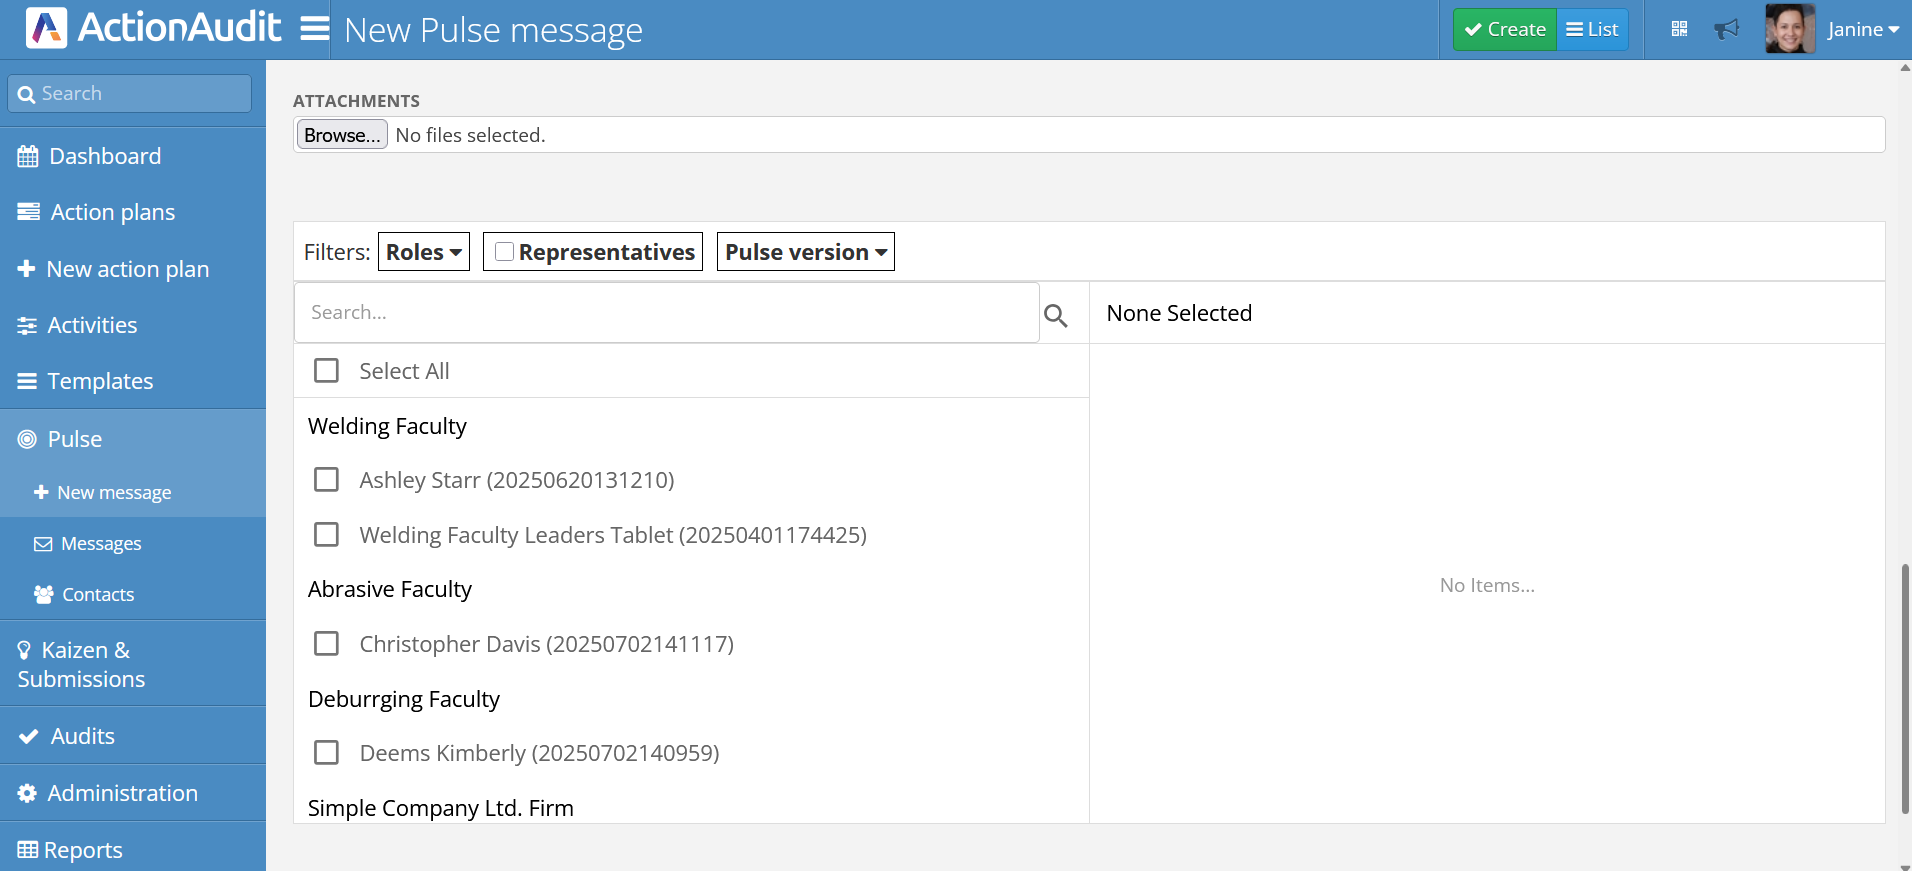
Selecting Message Recipients
By default, clicking Create sends the message to all users assigned to the selected organizational cell and its sub-cells. However, you can choose specific recipients.
Use the area below the message content field to select recipients using checkboxes. You can search for users or use filters.
Message Statistics
To access message statistics, use the statistics button on the message tile or click its title. This opens the following window:
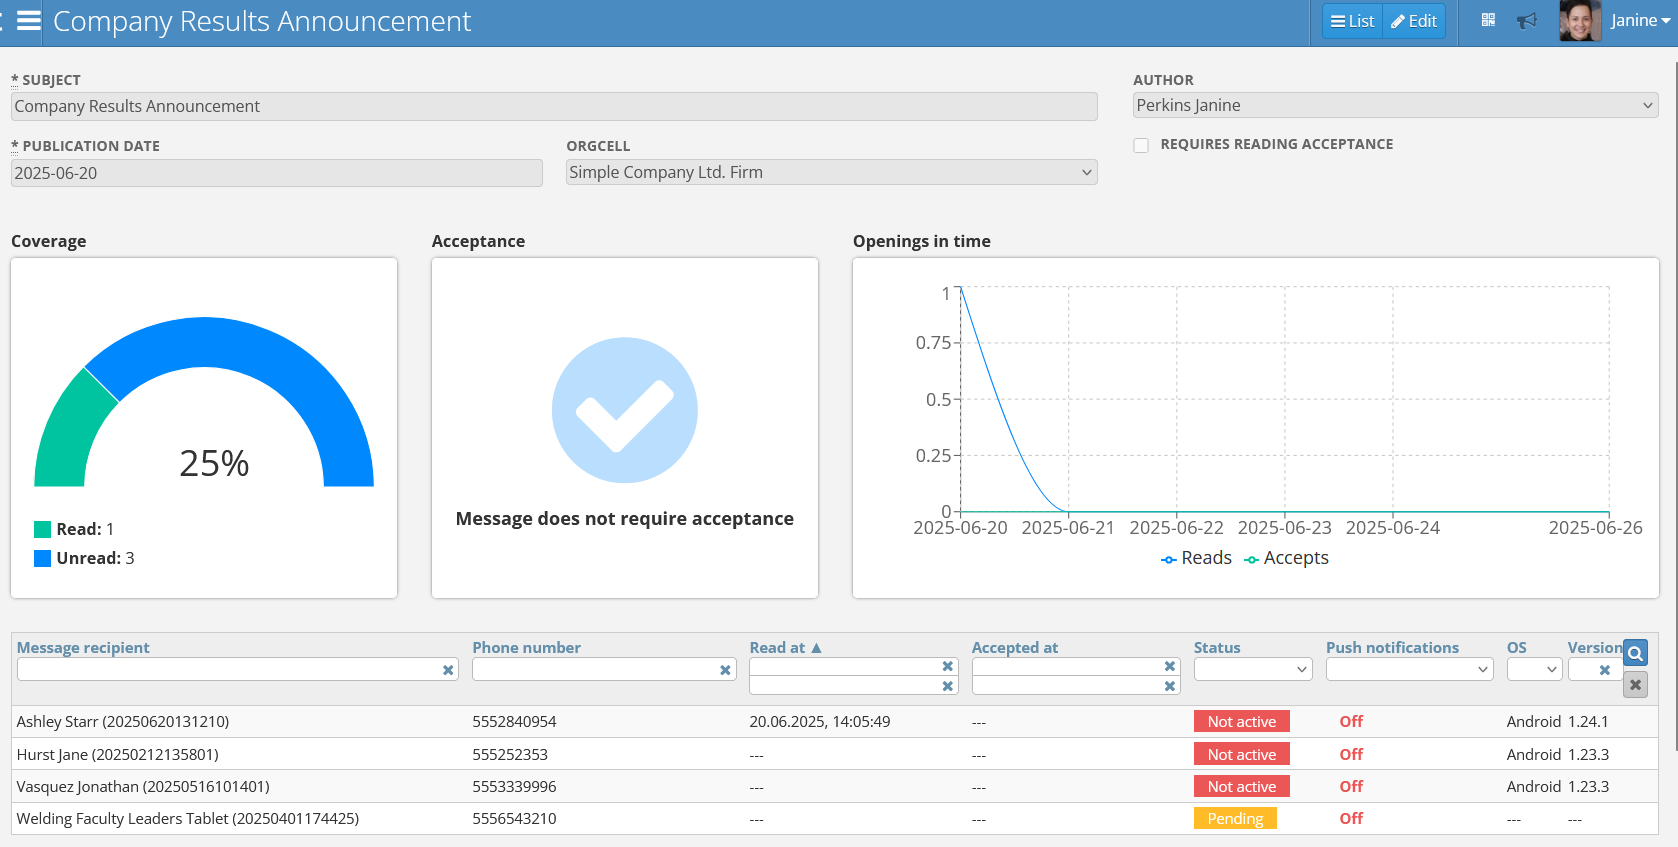
It includes:
- Subject
- Author
- Publication Date
- Orgcell
- Requires reading acceptance
Statistics available:
- Coverage – percentage of recipients who read the message
- Acceptance – percentage of recipients who confirmed reading (if required)
- Openings in time – chart showing opens over time
Below that, detailed stats for each recipient:
- Name and surname
- Phone number
- Read at
- Accepted at – if applicable
- Status – user’s app status:
- Active – logged into Pulse
- Not active – not logged in
- Pending – in the login process
- Blocked – access blocked
- Push Notifications – whether push notifications are enabled
- OS – operating system info
- Version – version of the Pulse app used
Contacts
The Contacts section displays all Pulse app users assigned to the user’s org cell, along with stats on their status and assignments.
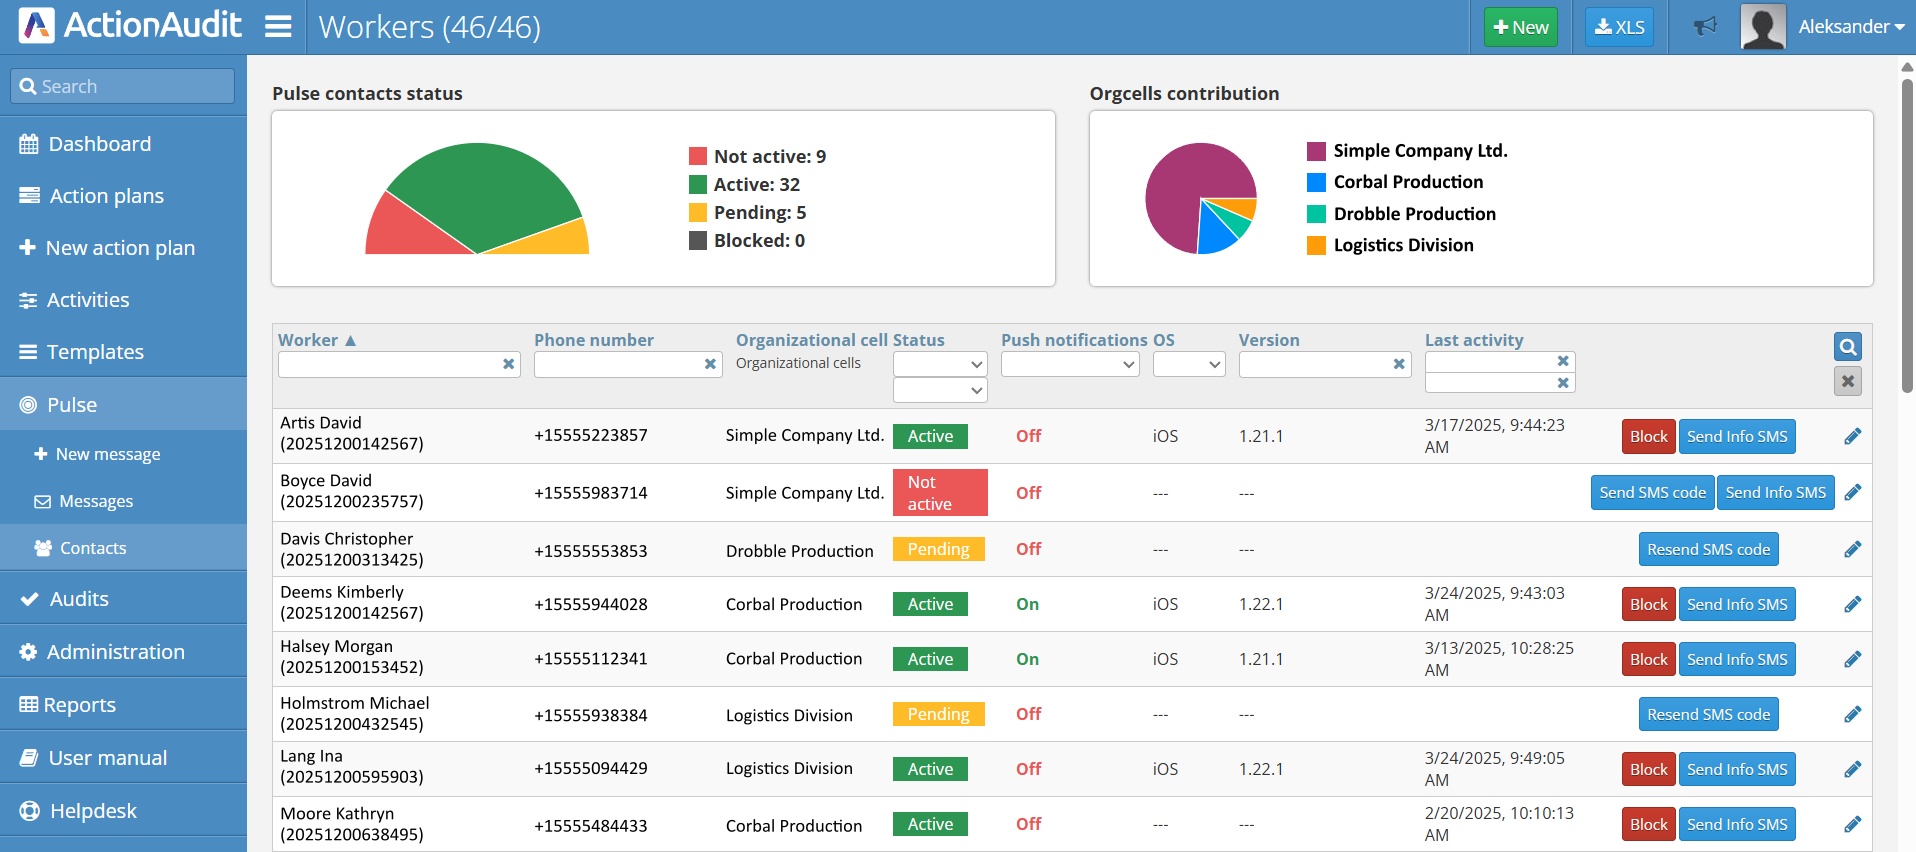
At the top, you’ll find status stats and a graph showing how many users are assigned to each org cell.
Below is a list of Pulse users in your org cell. Each is represented by a tile showing:
- Name and surname
- Employee number
- Phone number
- Org. cell
- Status:
- Active – logged into Pulse
- Not active – not logged in
- Pending – in login process
- Blocked – access blocked
- Push Notifications – enabled/disabled
- OS
- Version
- Last activity – date and time of last app activity
In the top right corner, the XLS button allows exporting the contact list to an Excel file.
Managing Contacts
Pulse Administrators and Managers can manage Pulse contacts using the buttons on each tile:
- Block – blocks access to the app
- Unblock
- Send SMS Code – sends a login code
- Send Info SMS – sends access and download info
- Edit (Pencil Icon) – edit employee details
A user can be blocked by an admin or automatically by the system after multiple failed login attempts.
Creating a New Pulse Worker
Pulse Administrators and Managers can create new Pulse Workers using the green ”+ New” button in the top right corner. This opens the following window:
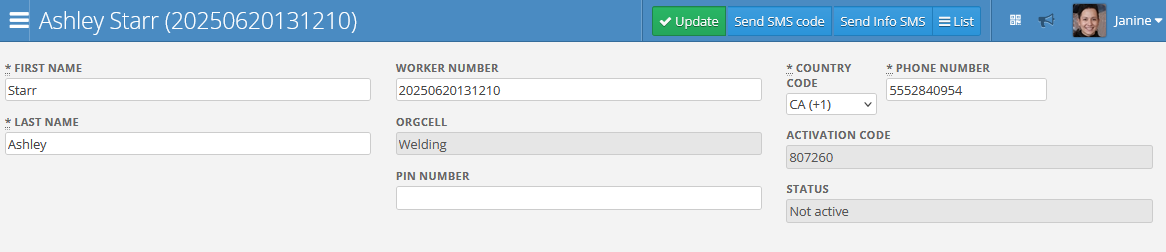
To create a new worker, fill in:
- Name and surname
- Employee number – auto-assigned but editable
- Country code
- Phone number – number to which the code will be sent
- Org. cell
- PIN number – optional PIN for use in the Action Booth app
When editing an existing user, additional fields appear:
- Activation code – required for logging into the Pulse app. This code appears when the user enters their phone number on the Pulse login screen
- Status – user status information