Adding a new audit
A new audit can be added in three ways:
- through the Audit Schedule
- through the Group Schedule
- by creating an Ad-hoc Audit
- by Importing Audits from an xlsx File
The Audit Schedule and Group Schedule allow the automatic creation of audits based on predefined schedules, ensuring that the group administrator does not have to manually create and assign audit activities. However, if there is a need to create a single action outside the usual schedule, an individual audit can be added outside the planned schedule by selecting Ad-hoc Audit.
Audit schedule
The audit schedule is described in detail in the “Audit Schedule” chapter.
Group schedule
The group schedule is described in detail in the “Group Schedule” chapter.
Ad-hoc audit
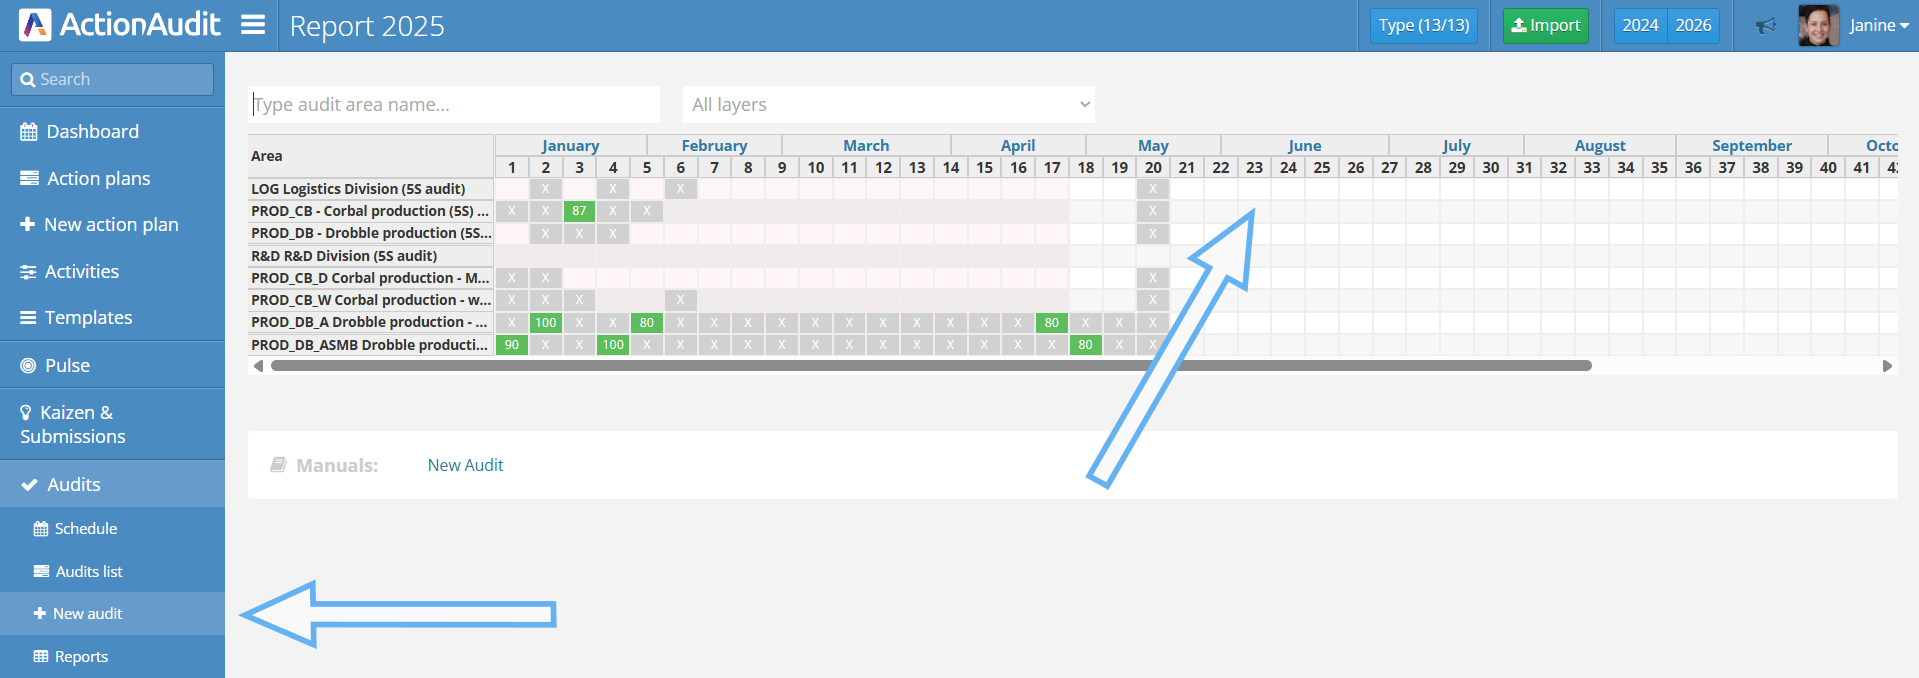
To create an ad-hoc audit, use the left menu bar, from the Audits section, in the New audit tab. A report view representing months and weeks will be displayed.

Select the appropriate audit area and the week in which the audit should start.

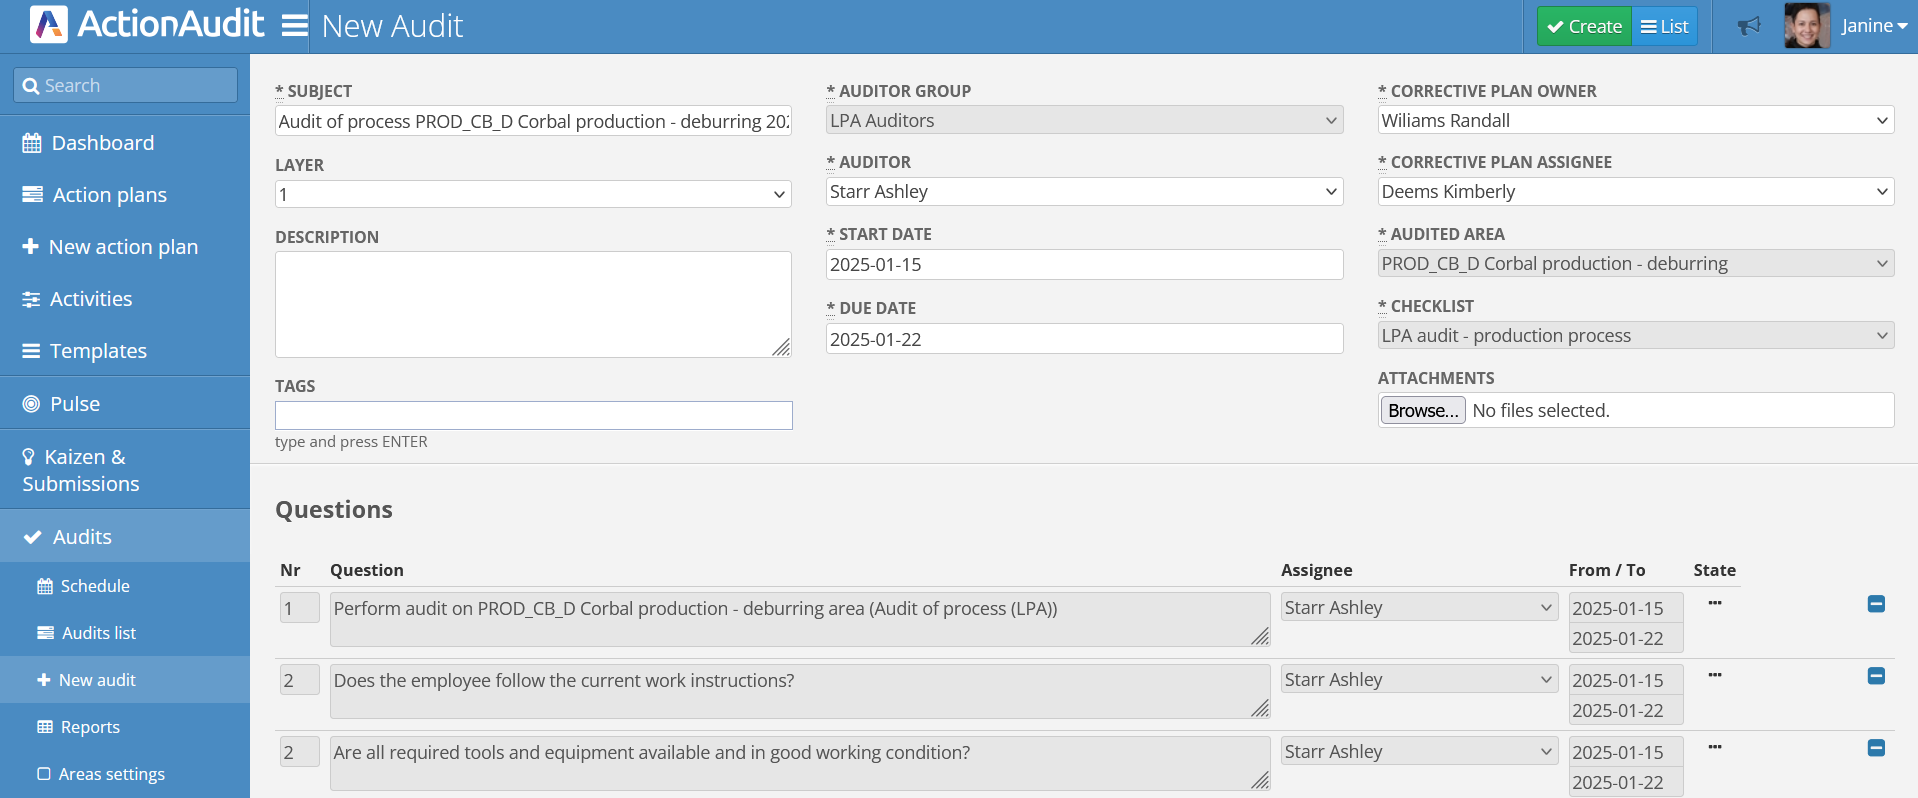
Then, the audit creation form will be displayed. By default, settings for an audit conducted in the selected area will be loaded, but all options can be changed. To create a new audit, fill in the following fields:
- Subject - the name of the audit
- Layer - the layer of the audit checklist. Only questions set in the selected layer will appear in the audit
- Description - a description of the audit (optional)
- Tags - the ability to add or create tags for the audit. They may be helpful later when searching for the audit in the audit list (optional)
- Auditor group - the auditor group assigned to the given area. It can only be changed through the audit area settings
- Auditor - the person responsible for conducting the audit, selected from the auditor group assigned to the area
- Start Date - the date the audit activity begins
- Due Date - the date by which the audit should be completed. If the auditor does not meet the deadline, the audit will be considered delayed
- Corrective plan owner - the user who will become the owner of the correction action plan after the audit
- Corrective plan assignee - the user who will be responsible for the corrective activities included in the corrective action plan after the audit
- Audited area - the area to be audited. It was selected from the monthly and weekly view
- Checklist - the selected Checklist assigned to the audited area. It can only be changed through the audit area settings
- Attachments - additional files (optional).
Below these fields, there is a list of questions that the audit will consist of. It has been selected by default depending on the audit layer and the language chosen by the auditor. Questions can be removed using the minus button on the right.
Importing audits from an xlsx file
If there is a need to add audits that occur irregularly and cannot be scheduled using a standard schedule, an option is available to import audits from a pre-prepared xlsx file, where the audits and their details are defined.
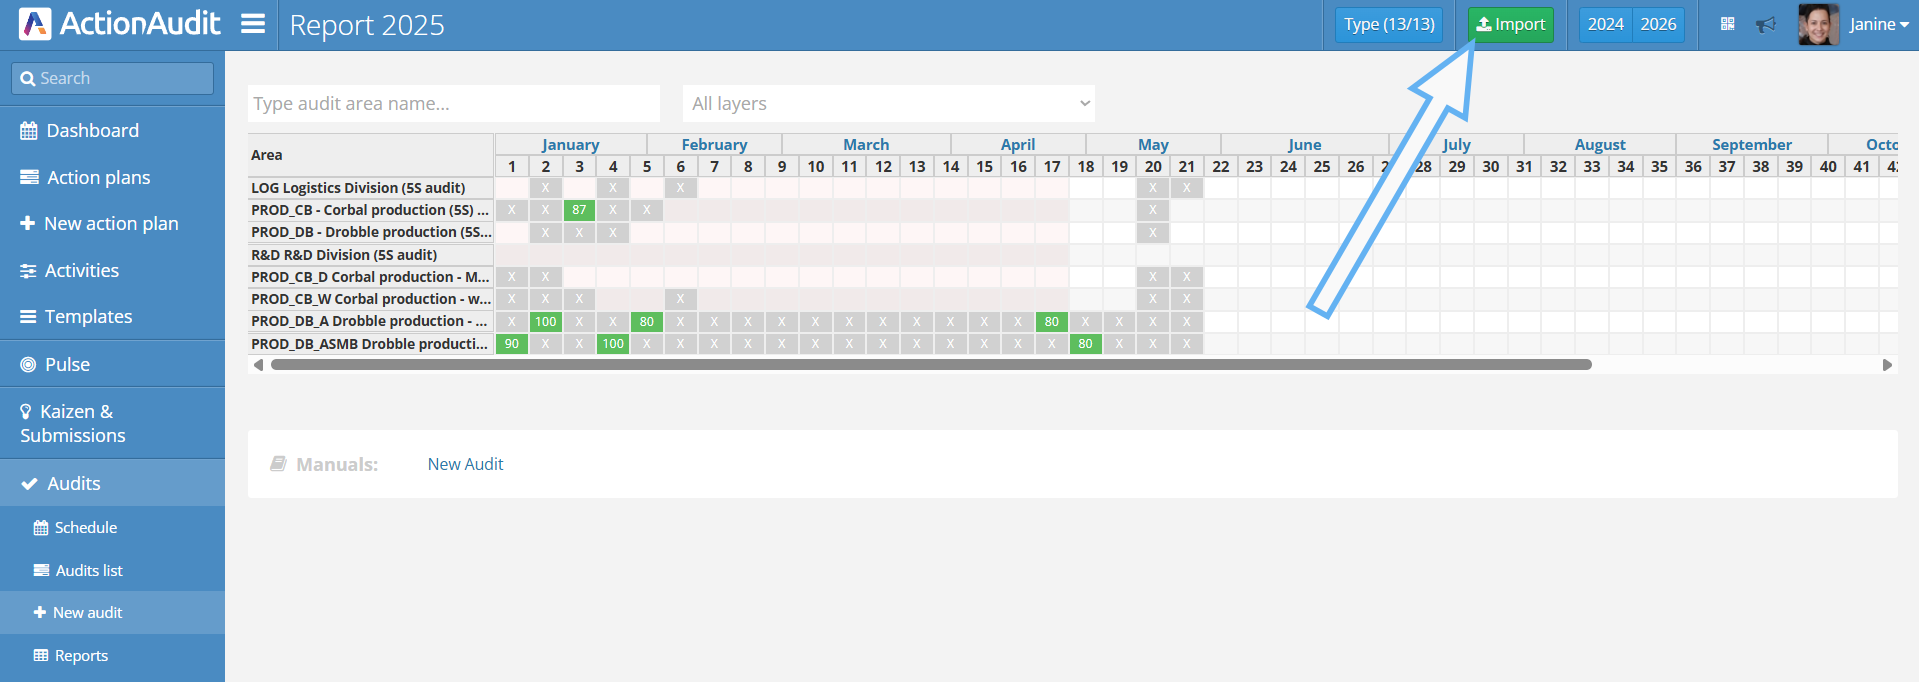
To do this, use the left menu bar, go to the Audits section, and select New Audit. Then, click the green Import button.

After clicking the button, the following panel will appear:

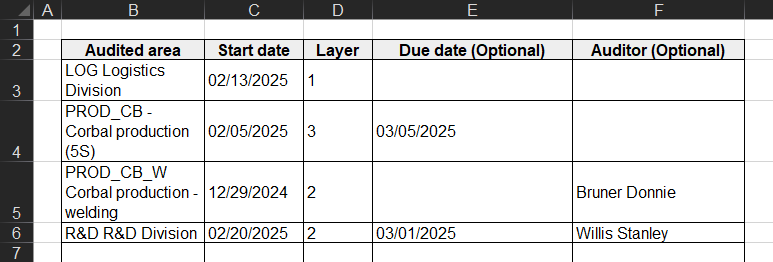
To correctly prepare the audit file, click the Download Template button and open the downloaded template. The following form will be displayed:

To add an audit, fill in the appropriate fields:
- Audited Area - Select the audited area. Clicking the respective cell will display a button that allows expanding the list of audit areas available for the given client.
- Start Date - The start date of the audit.
- Layer - The audit layer.
- End Date (Optional) - The end date of the audit, which is not mandatory.
- Auditor (Optional) - The auditor assigned to perform the audit. Clicking the respective cell will display a button that allows expanding the list of available auditors for the given client. Providing an auditor is not required. If this field is left blank, an auditor will be assigned randomly. It is important to ensure that the assigned auditor is a member of the Auditor Group assigned to the given area.
After saving the file, return to the web application and click the Choose File button. Once the correct file is selected, click Import. If all data has been entered correctly, a confirmation message will appear upon successful import.
After the file has been successfully imported, all audits that are scheduled to take place in the future will receive the “Planned” status. Audits with this status are visible only to users with the Administrator or Audit Manager role; regular auditors cannot see them.
At the moment the file is uploaded, all auditors will receive an email with information about all planned audits. When the scheduled audit date arrives, the audit’s status will change from Planned to Pending, and it will become visible to the auditor in the application.
When downloading the template from the application, information about audit areas and users is also retrieved. This ensures that when selecting the audited area and auditor, manual data entry is not required.