New audit quick start
This guide provides the minimal knowledge about the Action Audit system, allowing the user to quickly start working with the system.
To create the first audit, the following steps should be taken:
Checklist
Create checklist related to the audited entity:
- First, use the left menu bar, go to the Audits tab, and select the Checklist settings section.
- When the checklist screen appears, click the green New button.
- Then, fill in the displayed fields according to the audit’s assumptions. More details here
- After filling in the fields, add questions. To do this, click the New Audit Question button, which will add a new question at the bottom of the list. Then, complete the displayed question fields.
- To confirm the checklist settings, click the green Create button.
- After clicking the List button, a screen displaying all question lists will appear, including the newly added list.

Auditors group
Create an auditors group, i.e., a group of people assigned to conduct the audit:
- First, use the left menu bar, go to the Audits tab, and select the Auditors settings section.
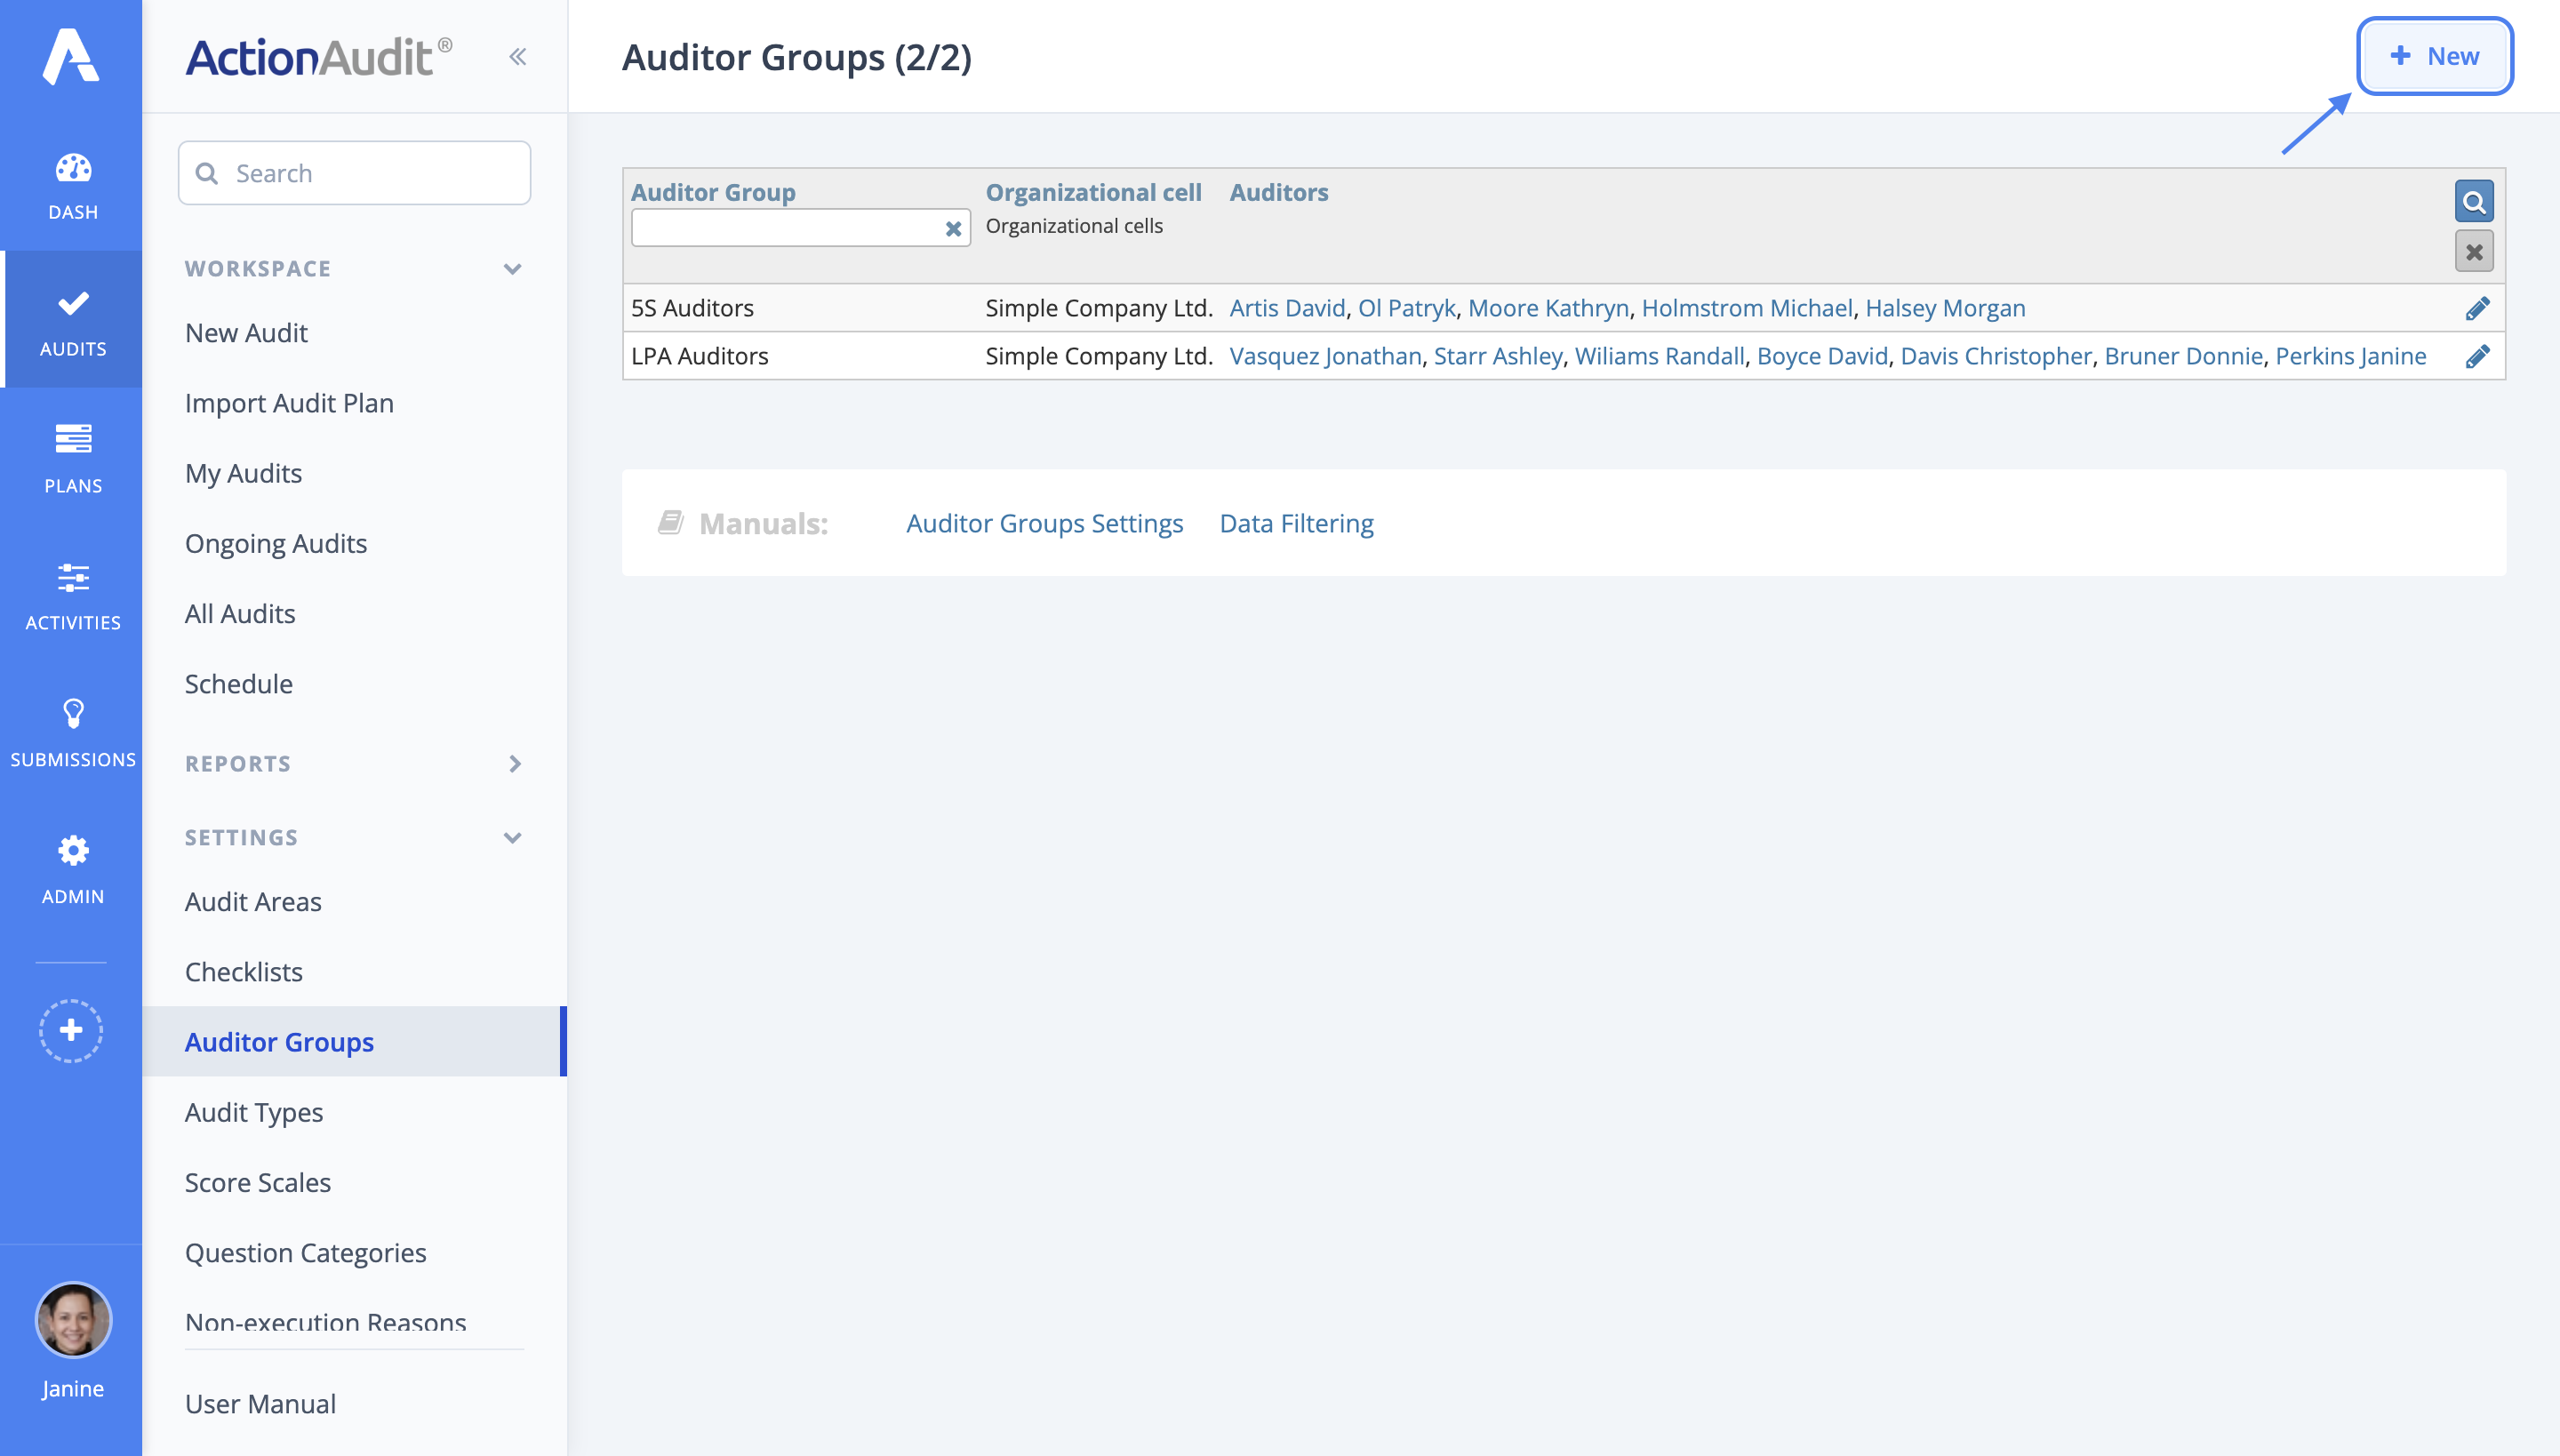
- When the auditors’ group screen appears, click the green New button to create a new group.
- Next, select the name and organizational unit for the group. Then, click the green Create button. After this action, it will be possible to add users to the group. More details here
- After entering all users, click the green Update button. The group will be saved in the system.
- After creating the group and clicking the List button, a screen displaying all auditor groups will appear, including the newly added group.
Audit area
Create an audit area:
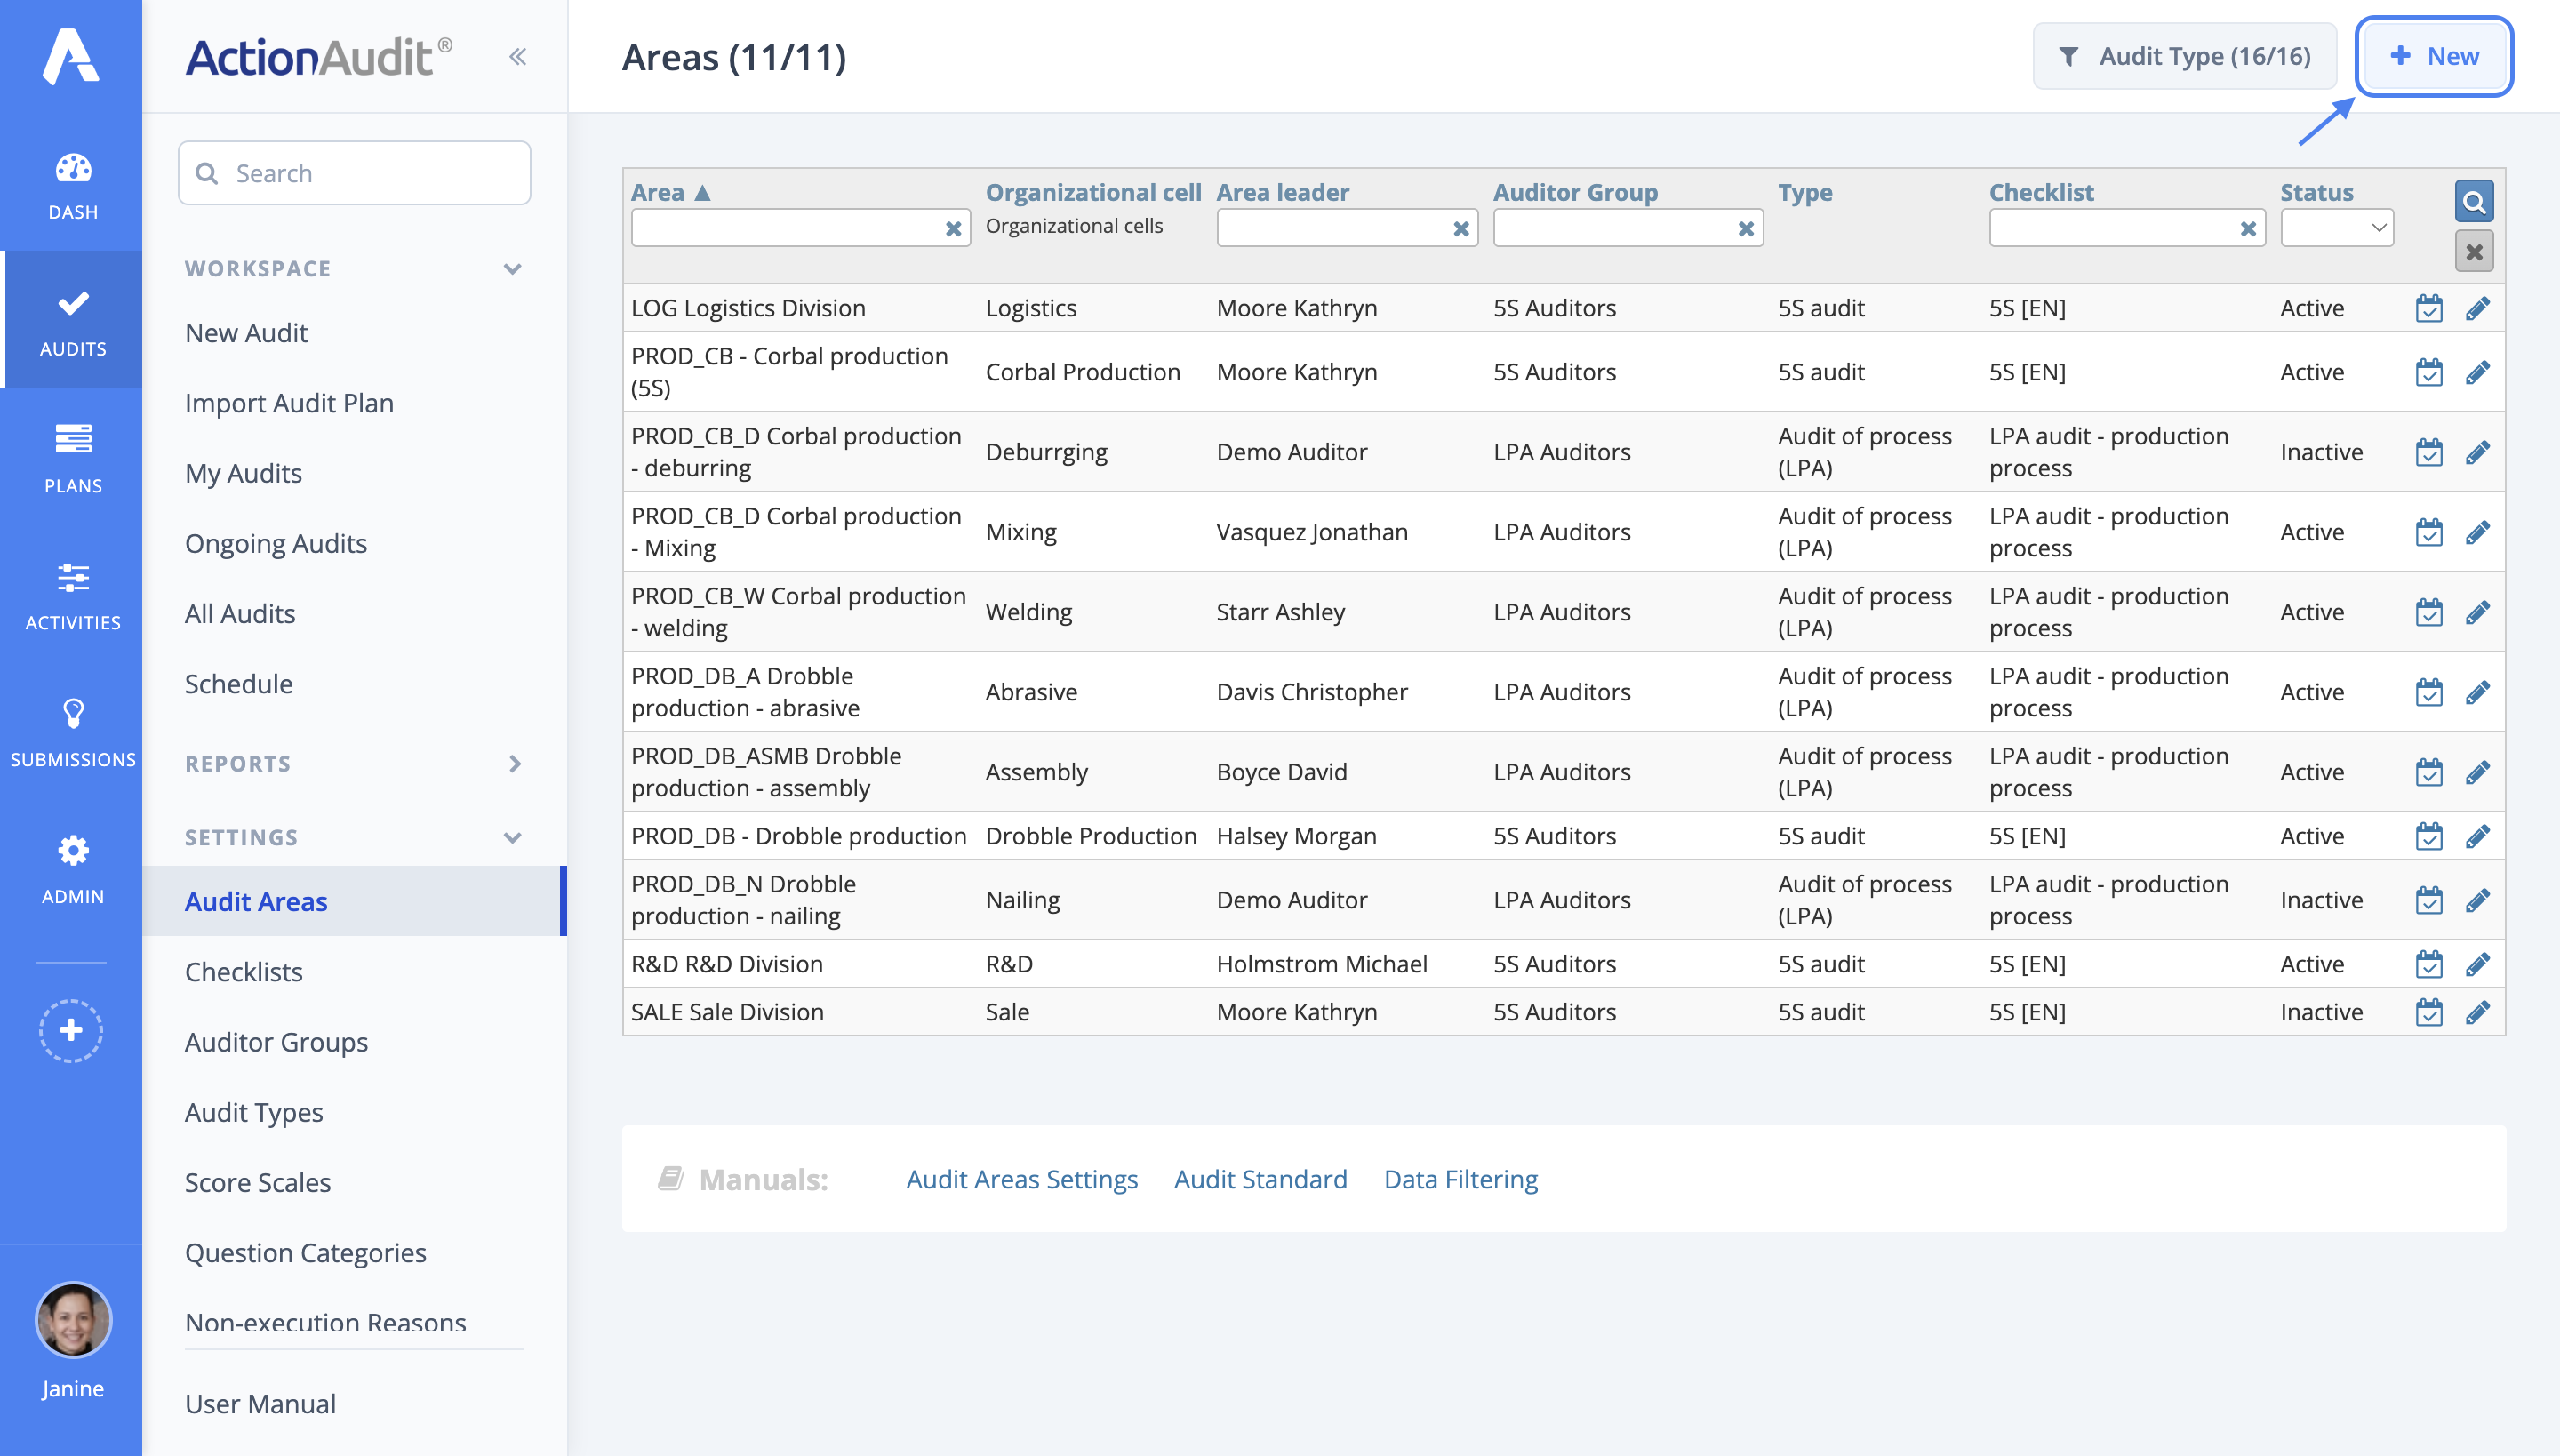
- Use the Areas settings section under the Audits tab.
- When the screen with the list of areas appears, click the green New button.
- The screen for adding a new area will be displayed. Fill in all the information related to the area.
- After completing the fields, click the green Create button.
- After clicking the List button, a screen displaying all zones will appear, including the newly added area.
Create the actual audit
Create the actual audit. There are three options for this step:
- Schedule for a specific area - in this case, the audit is assigned to a specific area and repeated according to a given schedule.
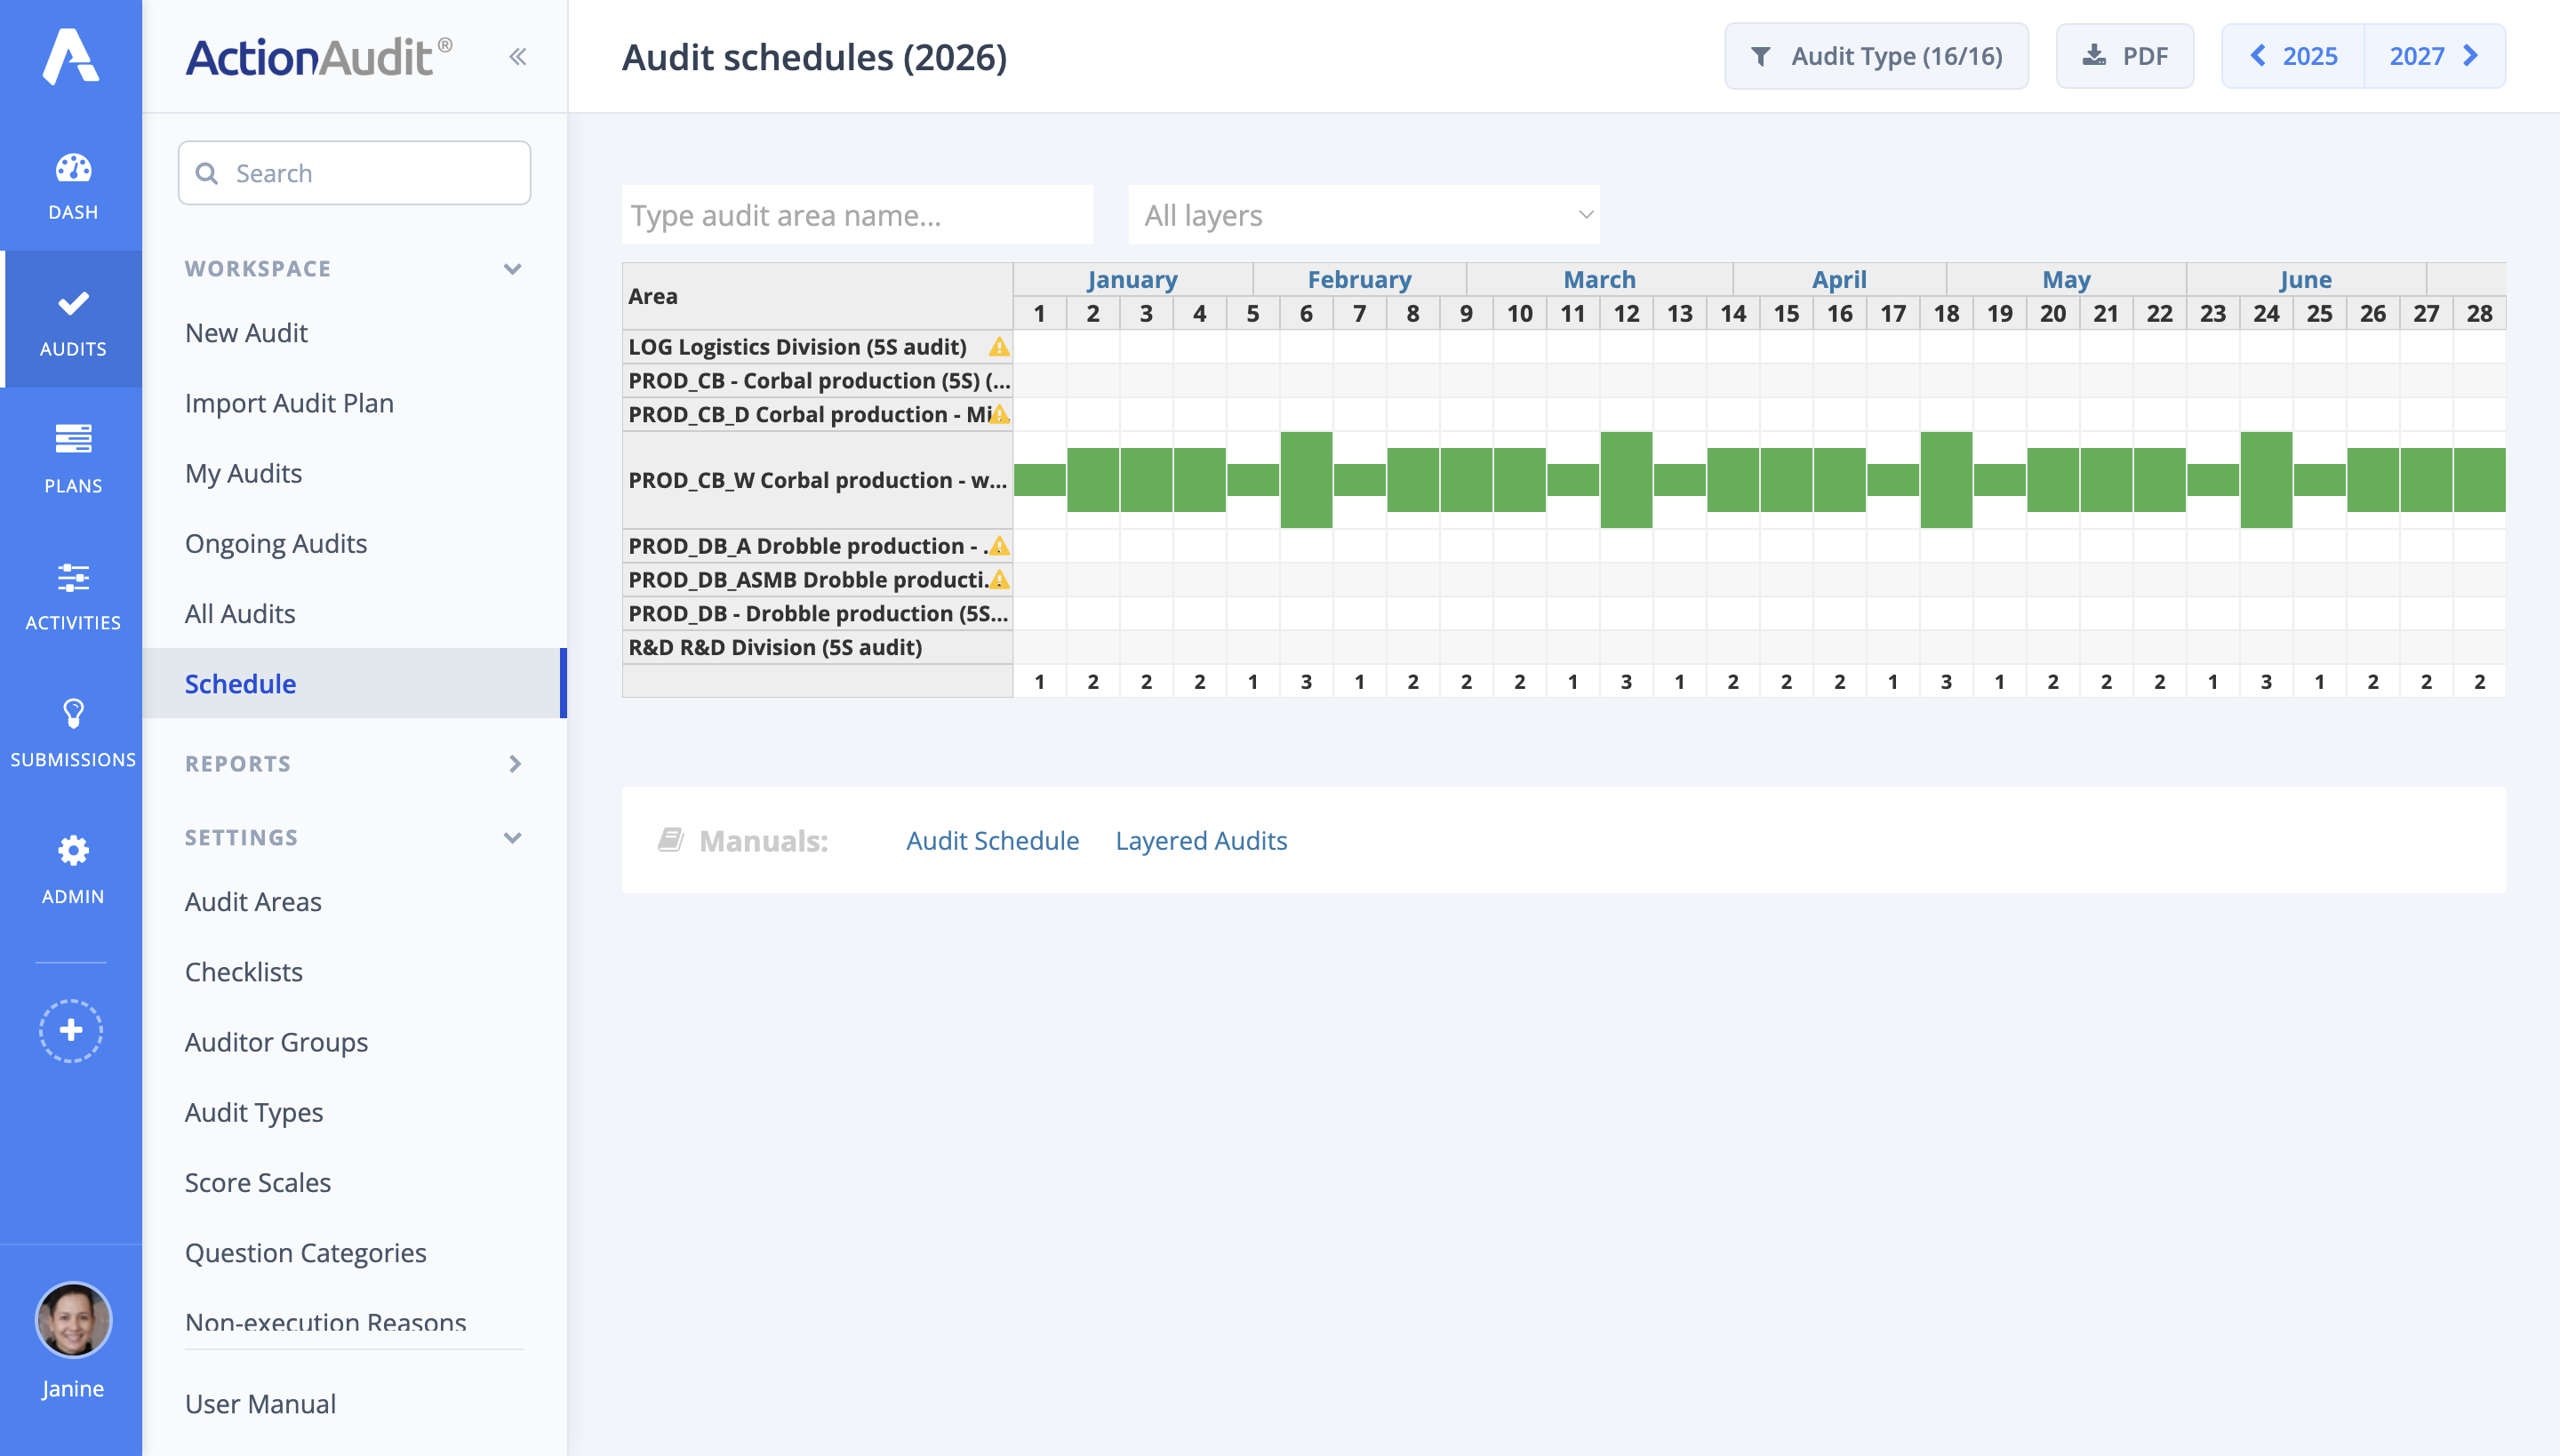
- To configure this option, use the Audits tab and select the Schedule section.
- Select the appropriate time period when the audit should start. More details here
- After selecting the period, a screen for creating a new schedule will be displayed. Enter the appropriate options here. More details here
- To confirm the settings, click the green Save button.
- A new audit will be created and visible in the schedule view.
- Subsequent audits in the given area will appear automatically.
- Schedule for an auditors group - this option allows assigning an audit to a specific auditor.
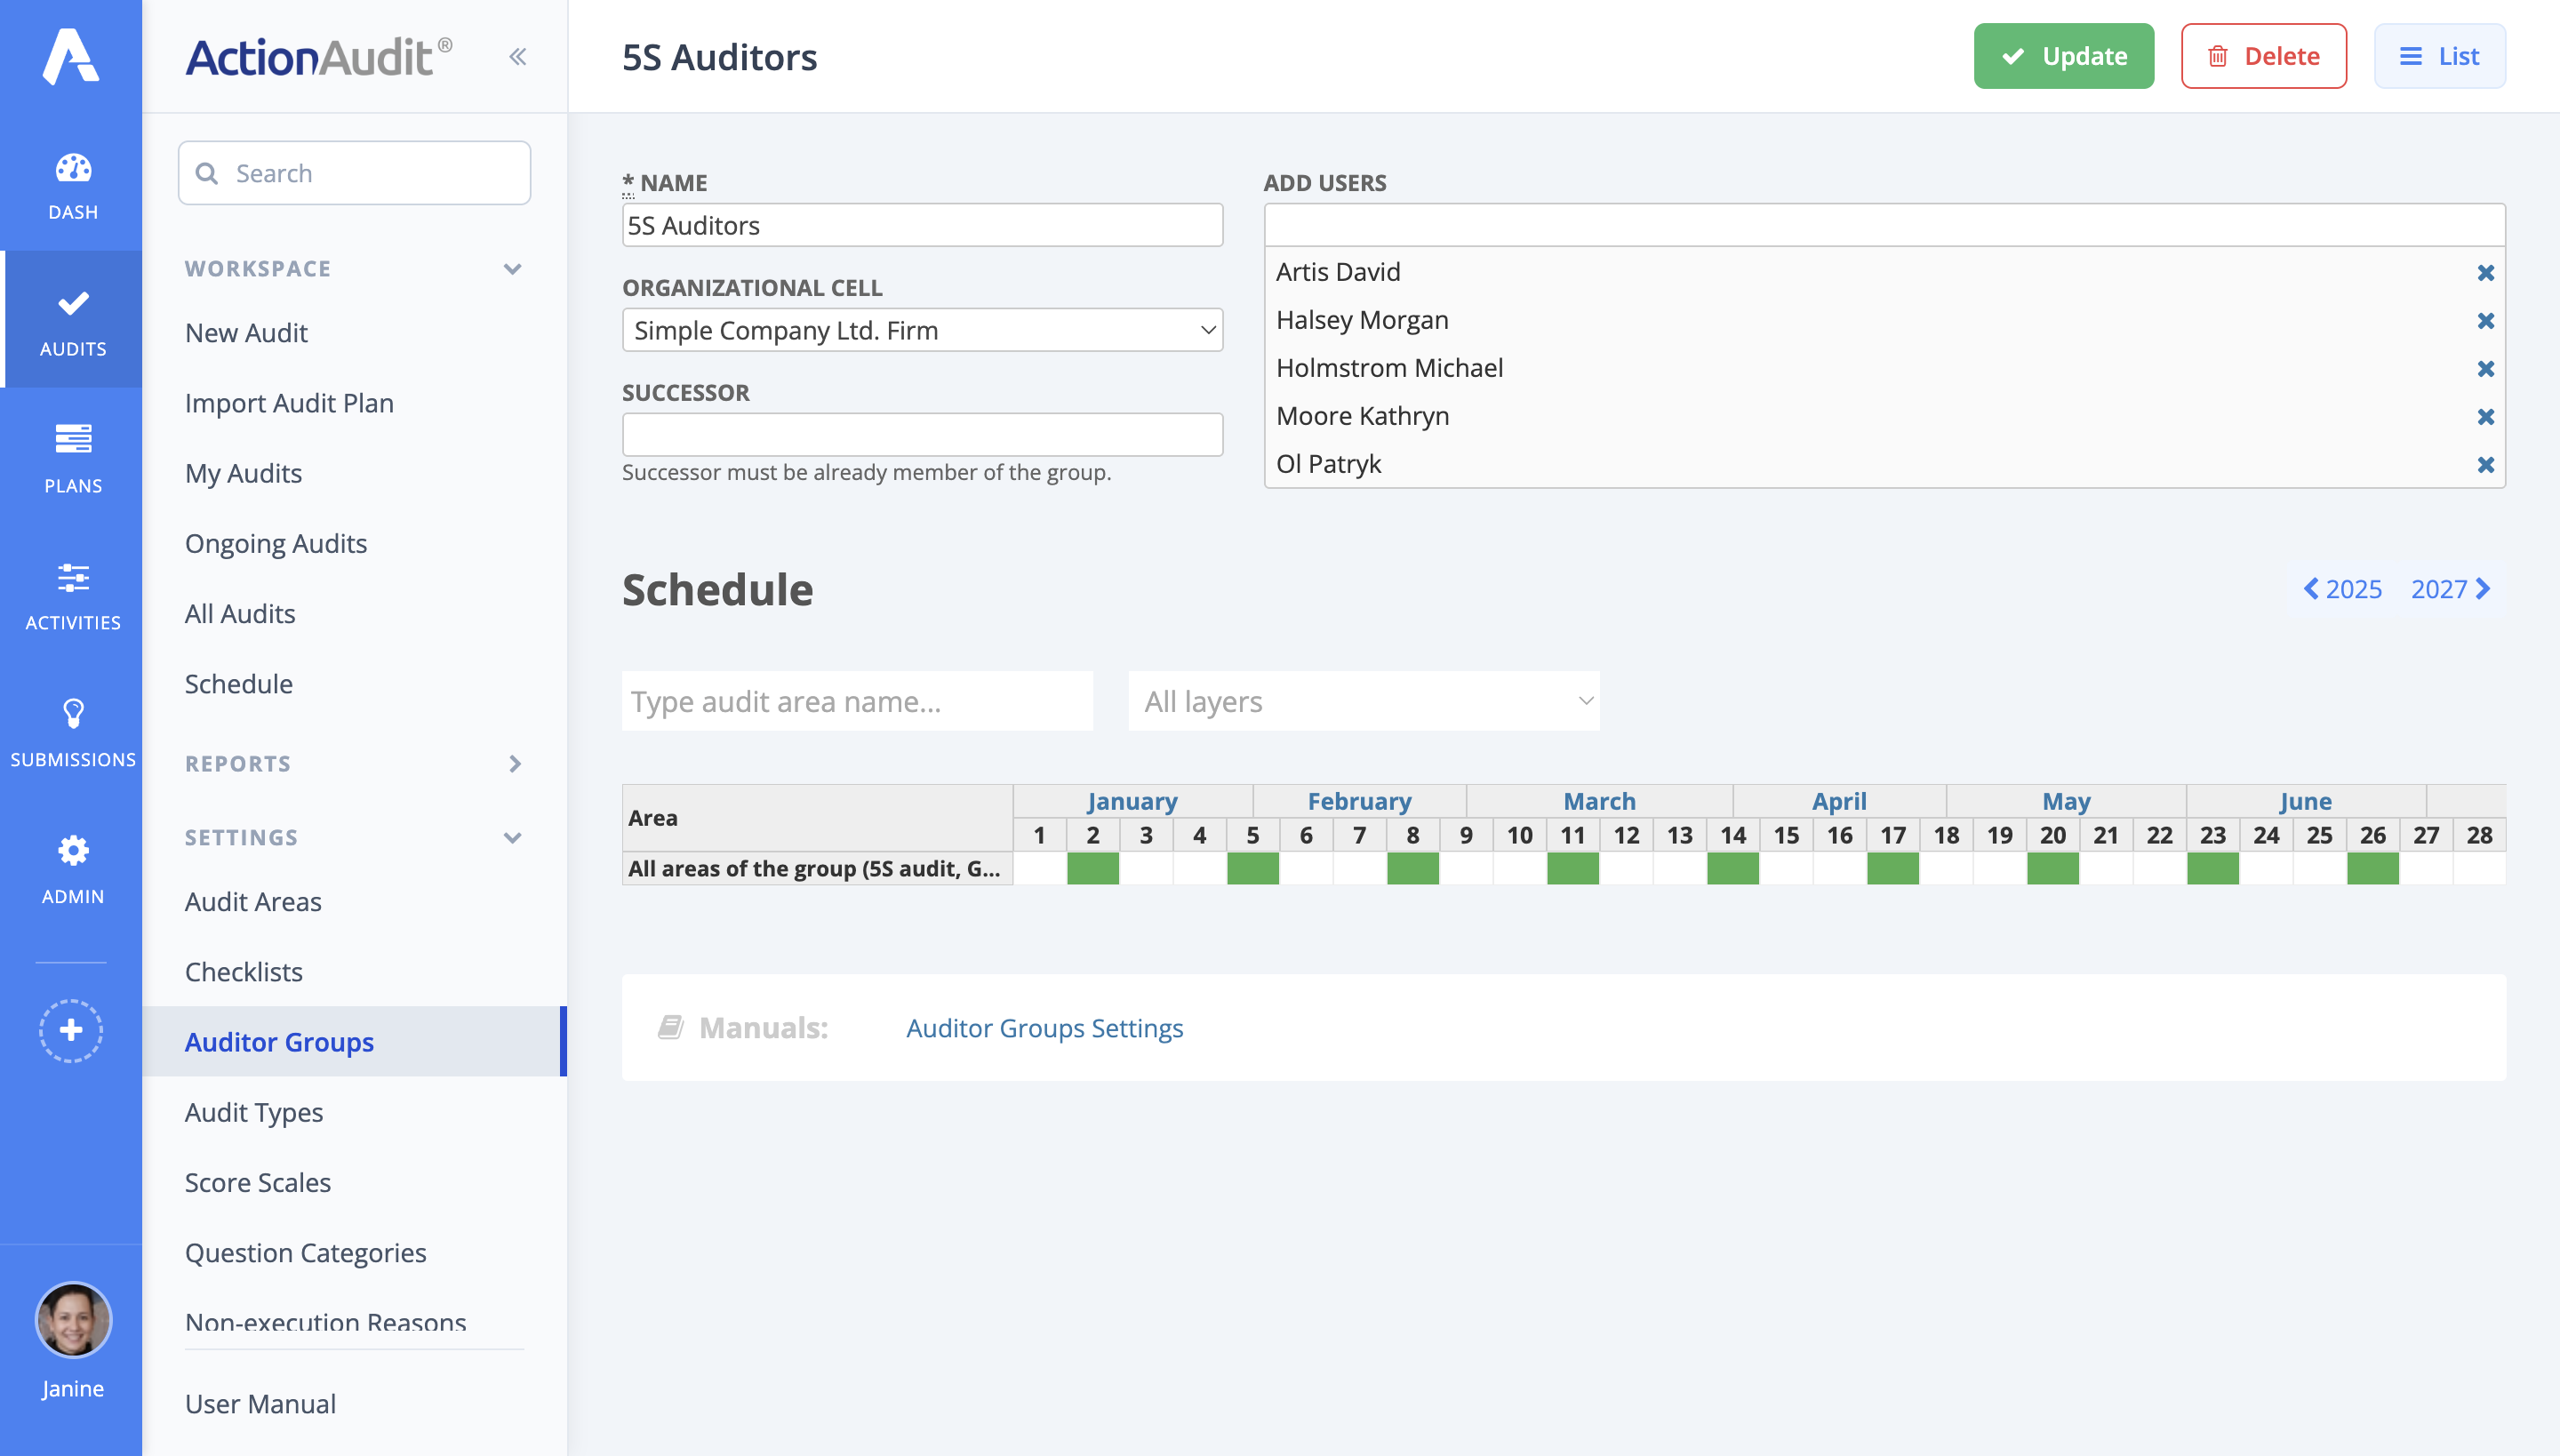
- To configure this option, use the Audits tab and the Auditor Groups settings section.
- Select an existing auditors group by clicking the pencil icon or create a new one.
- At the bottom of the auditor group view page, there is a Schedule section. Select the appropriate week when the audit should begin.
- After selecting a week, a screen for adding a schedule will appear. All options must be filled in, keeping in mind that in this view, audits are created for a specific group of auditors, and there is an option to configure audits for one or more areas.
- After filling in all the fields, click the green Save button. The created audit will be visible in the Schedule.
- Subsequent audits will appear automatically in the given area.
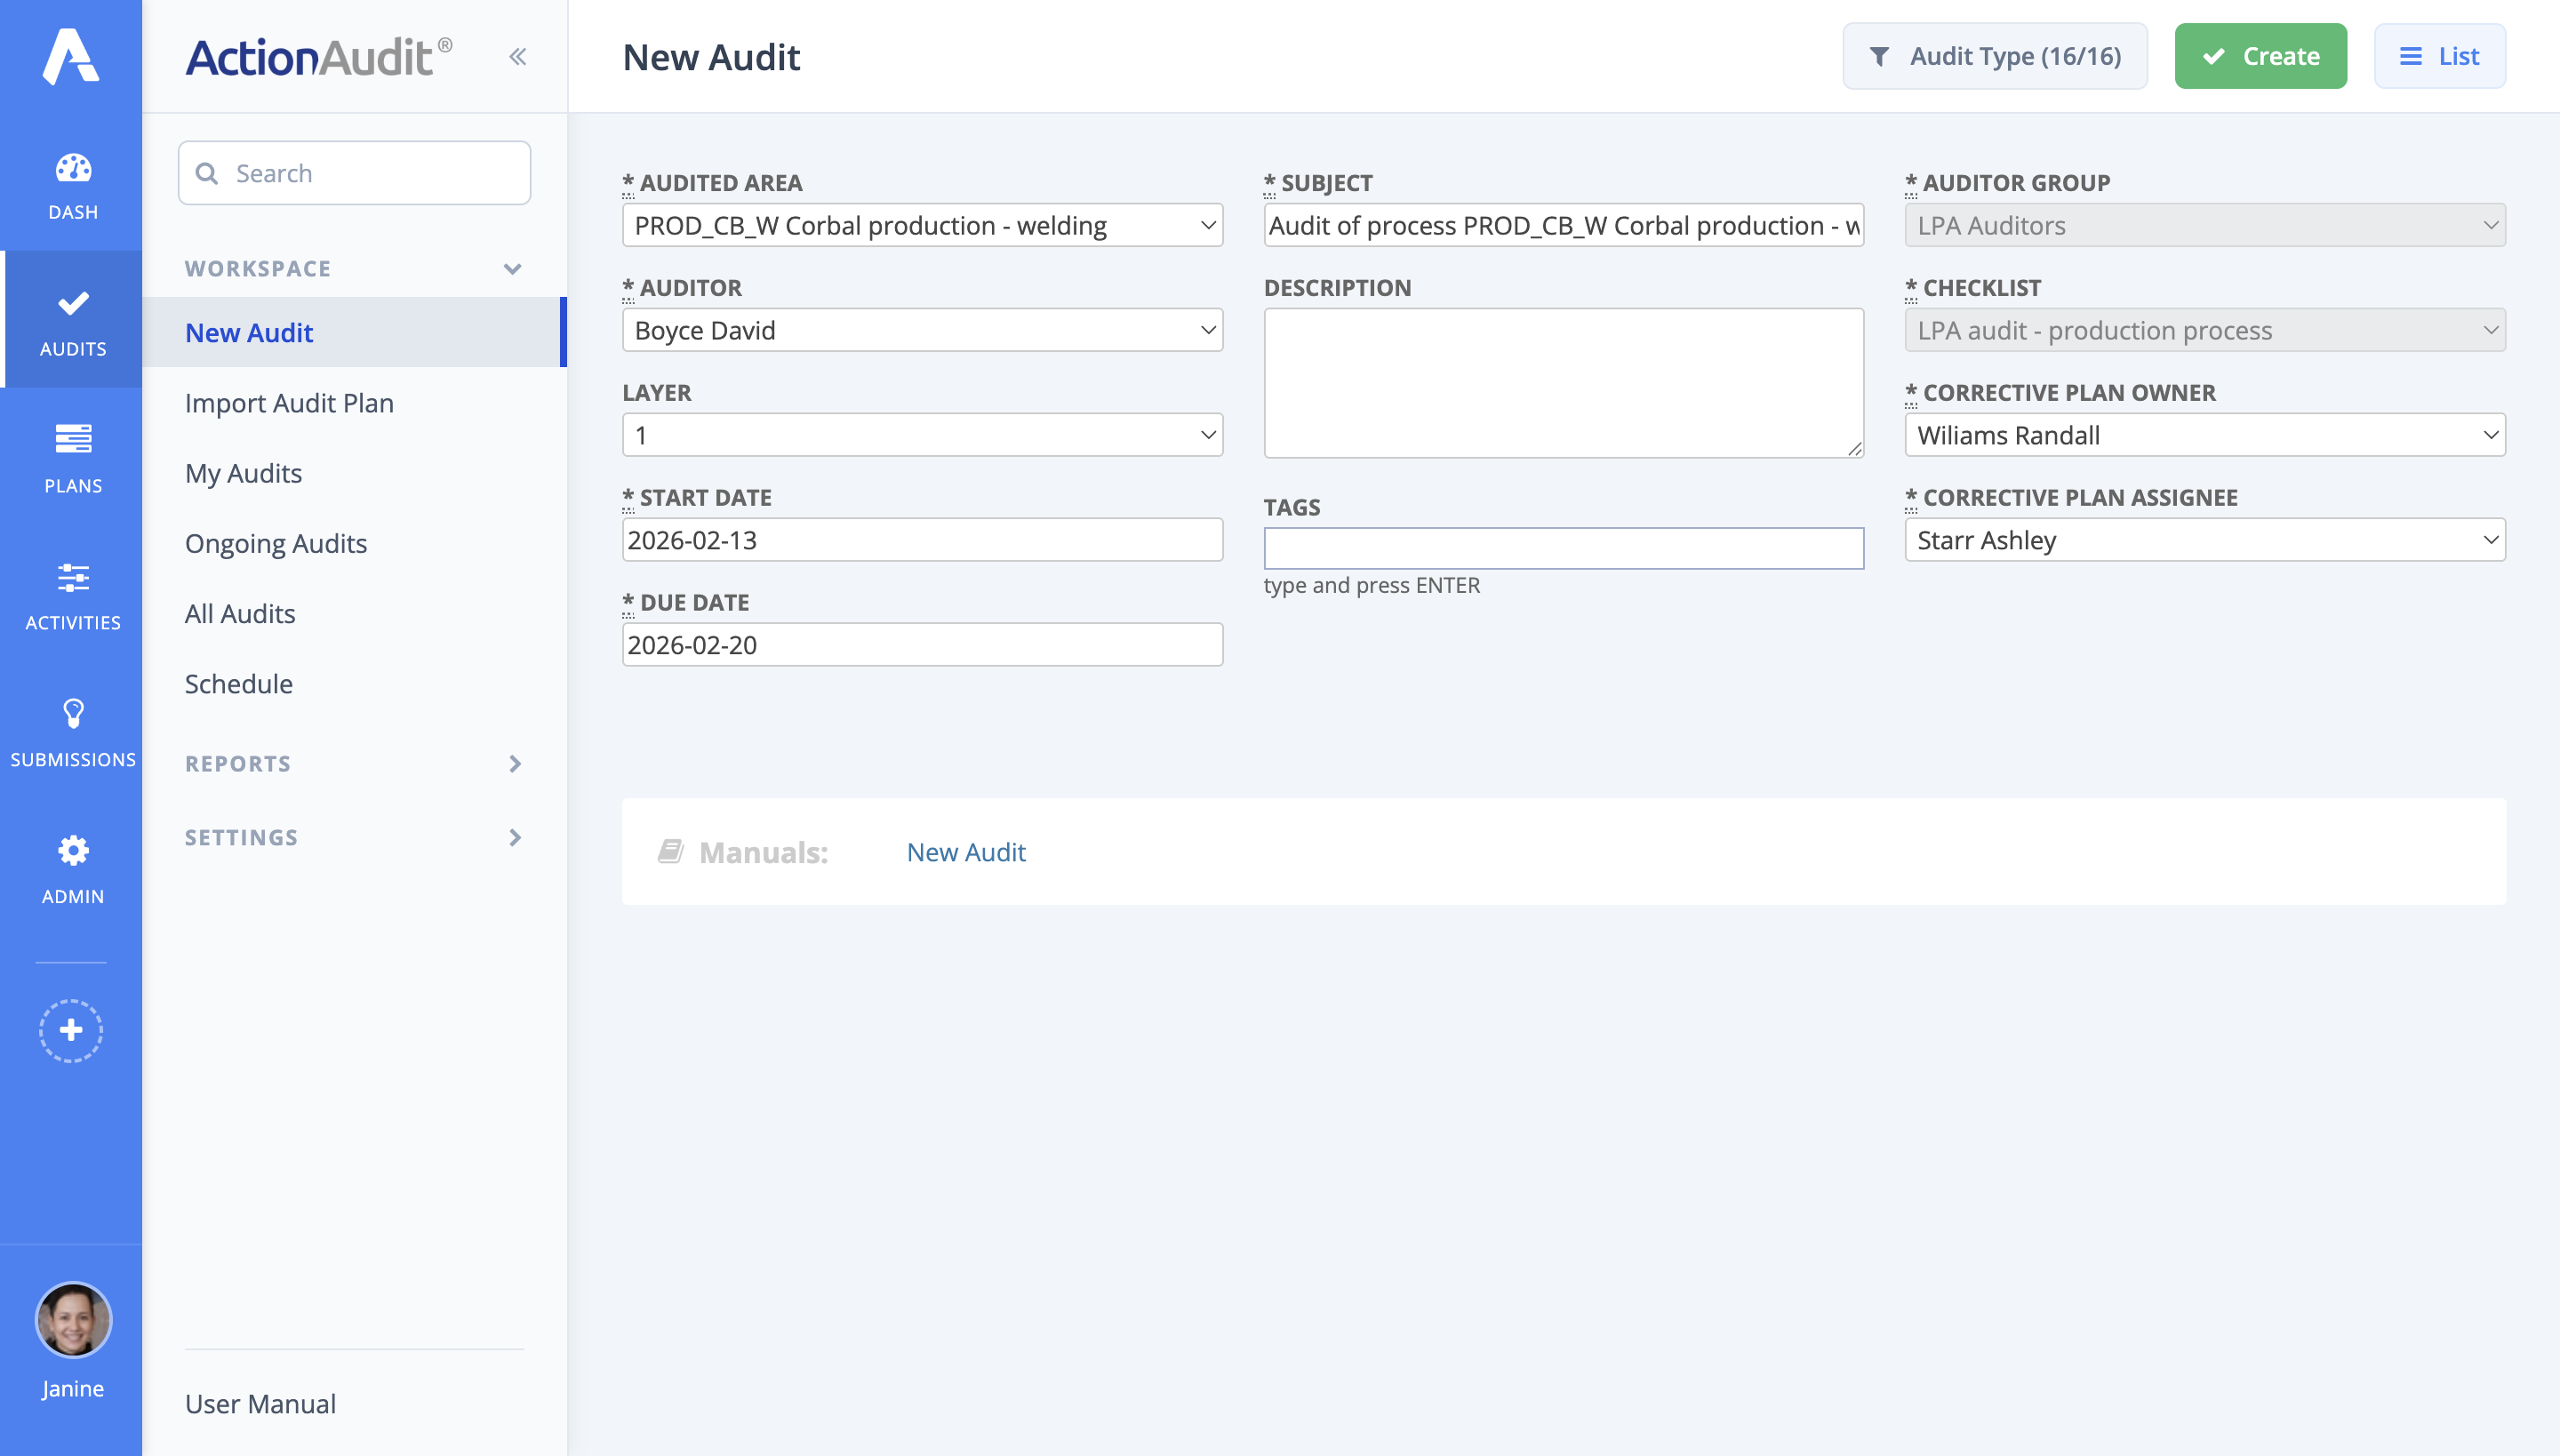
- Creating an ad hoc audit (manually) - this option allows creating an additional audit outside the set schedule, useful in case of urgent audit needs.
- This option is available in the Audits tab, in the New Audit section.
- After accessing this tab, the year view will be displayed, showing weeks of the year and conducted audits, with their score averaged weekly.
- To add a new audit, click one of the rectangles representing weeks. This will be the audit’s start date.
- Next, fill in the fields in the displayed audit creation form. After adding a checklist, the list of questions will appear. More details here
- To confirm the entered settings, click the green Create button.
- After clicking the List button, the summary view of audits will appear. The newly added audit will automatically start in the previously set week and will be displayed on this screen as a statistic after it is conducted.