Creating an Action Plan
To create a new action plan, use the left menu bar under the New action plan tab. Upon selecting this option, the new plan creation screen will appear:
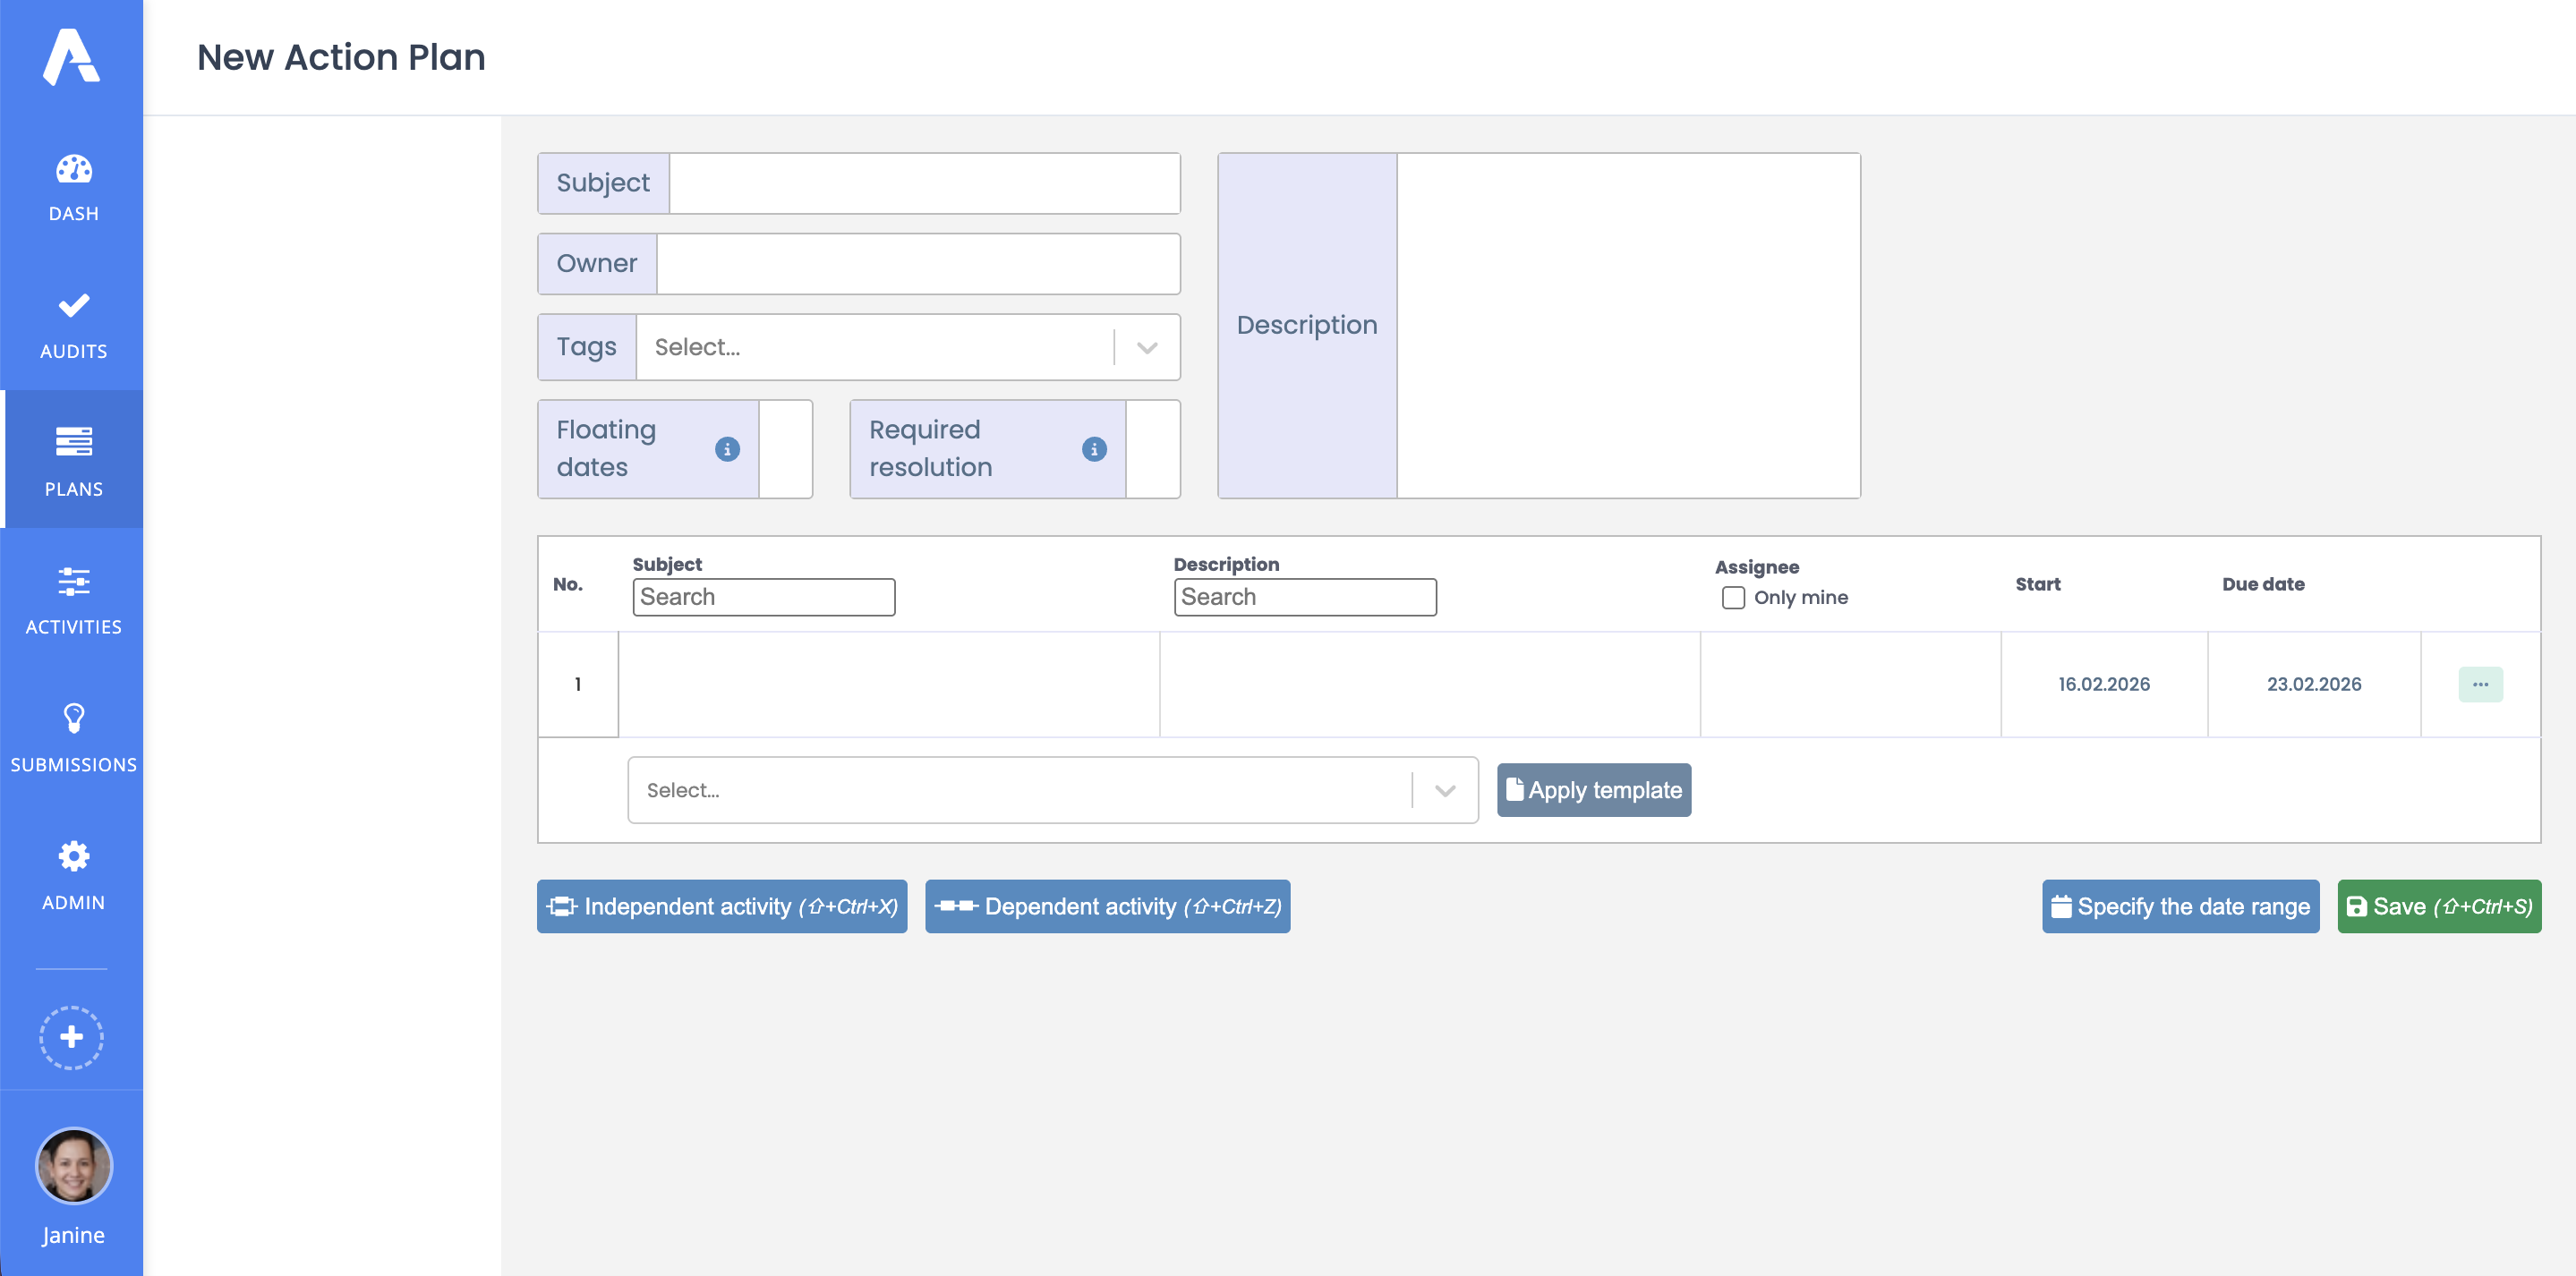
The following fields are visible:
- Subject - the name of the action plan.
- Owner - the person responsible for the action plan, who can accept completed tasks and make all possible changes.
- Tags - labels that allow assigning the action plan to the appropriate category. The user can choose from existing tags or enter a new one (optional).
- Flexible Dates - this option applies to dependent activity. When previous, unfinished tasks cause the time for subsequent actions to pass, their execution dates will be progressively shifted to avoid changing their status to delayed.
- Solution required - by selecting this option, the activity can only be completed after entering at least 10 characters in the solution field.
- Description - a short description of the action plan.
Below, there is an empty table where individual tasks will be entered, along with a view change panel.
Action Plan Owner vs. Person Responsible for Activities
The action plan owner is the user who manages the given plan. They can add users and assign them either editing or read-only permissions, accept or reject any activity, add controls, edit activities, and manage the individuals responsible for each specific activity.
The person responsible for activities is the user assigned to carry out a specific activity. They can add descriptions and attachments to their assigned activities but cannot manage the entire action plan.
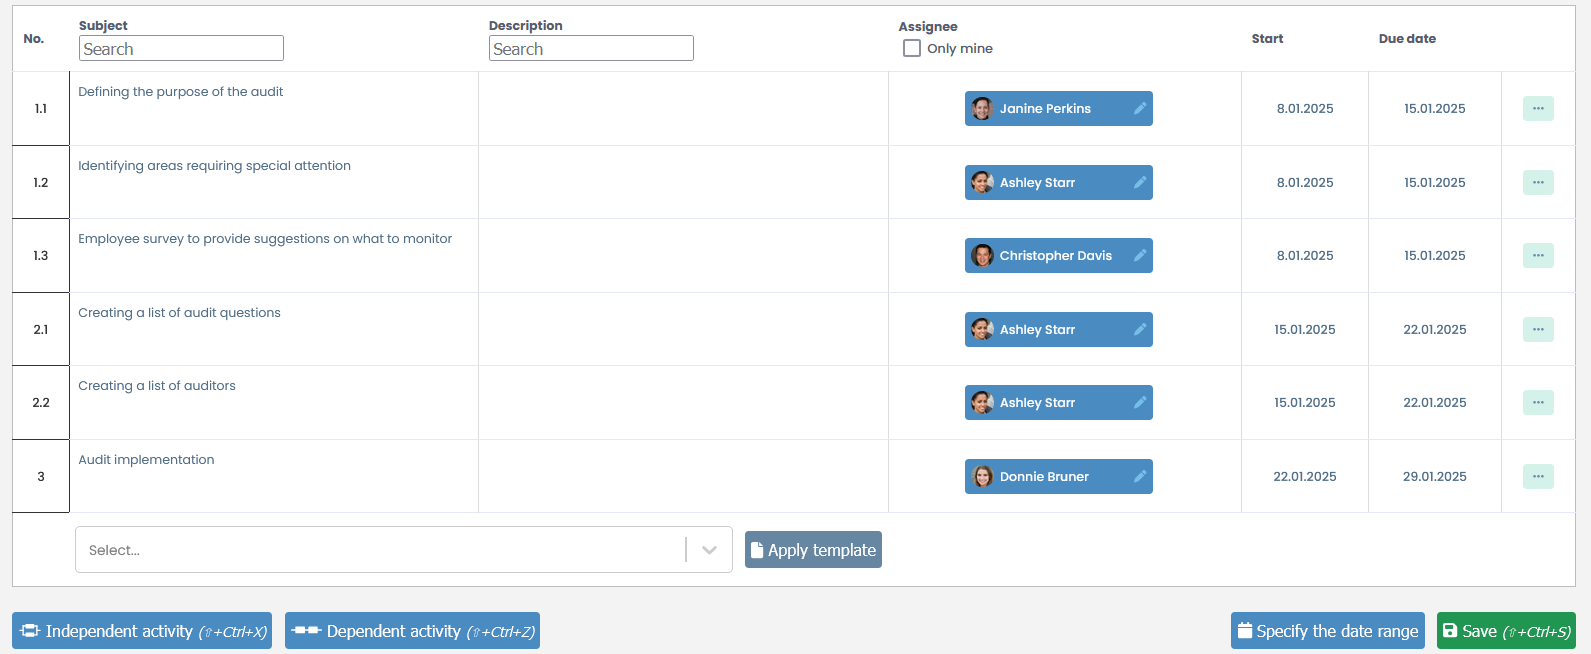
Adding activities
To add a new activity, enter it in the empty field in the table:

You need to fill in the action subject, responsible person, and the start and deadline dates, indicating the start and planned completion of the action. Optionally, a description can be added.
Types of activities
There are two types of actions that can be added:
Parallel activity
Independent of other activity that can be carried out at the same time. Activity performed at the same stage are assigned the same first ordinal number. To add a parallel action, click the button of the same name at the bottom of the table or use the green button with three dots in the last column.
Dependent activity
Actions that will only be fully completed after the previous actions are finished. They differ from parallel activities by having the next first ordinal number. To add them, use the button of the same name at the bottom of the table.
To save the created action plan, press the green Save button below the table.
It is possible to set time frames that will prevent the Start and Deadline dates from being set outside a specified period. To do this, use the Specify date range button below the table.